Thursday, December 31, 2009

Happy New Year


I am on vacation in a luxury log cabin on the edge of a beautiful frozen lake, enjoying some snow activities, and gazing out the huge windows at snowmobilers and skaters on the lake... I thank God for this wonderful chance to relax and enjoy some time with the family, without TO DO lists and deadlines...

I would like to take this opportunity to thank all the visitors to my blog, and especially my "Followers", for stopping by occasionally and for all your encouraging words. I wish you all the best for 2010. May the New Year bring you and your families much love, joy and peace.

Friday, December 25, 2009

Merry Christmas

I hope you all are having a Merry Christmas.

All is quiet in our house, with the kids happily playing with their new toys, so I decided to stop in on my favourite blogs.

I enjoyed a lovely Celtic performance of Carol of the Bells shared by Shady Gardener. Which reminded me of the Carol of the Bells in the Claymation Christmas Special, which I recorded from the TV a very very long time ago, and used to play it every year. Recently I had been telling my kids about it, but hadn't thought to look for it on You Tube. Sure enough, here it is - enjoy!:


Merry Christmas everyone. And best wishes for 2010.

Saturday, December 12, 2009

It's Beginning to Look a Little Like Christmas

There was a light dusting of snow in the Vancouver area yesterday, in the late morning. It was very pretty. I love how the hard surfaces all turn white.
First snow in Vancouver
I'm glad it hasn't snowed any more since then, but the sky looks heavy, and it feels like it could come at any time. I'm not looking forward to shovelling, or being stranded at home, so I hope it holds off a bit longer.

I finally got my act together, and put away all the empty pots into the shed, and hid away the hoses, and shut off the hose bib (the one which is not frost-free, the others don't get shut off). Only 1 pot couldn't be moved, since it is frozen down. And a strip of plywood which the landscapers left in the upper yard, it is also frozen down. So I'll need to wait until it rains, to put those away. But it feels nice to have everything otherwise settled for the Winter.

Today we had a chance to get our Christmas tree. We wanted to do the lumberjack thing, and cut our own, but I found a listing on Craigslist for freshly cut ones, up to 14' tall, for $25. That's a good price, and somehow we all felt a little tired, or lazy, or not looking forward to spending so much time in the cold...

Usually we buy natural Douglas Fir. These ones were Norwegian Fir, and one of the tall ones was really different than the others, a lighter colour of green, really short needles, and lots of branching. We had to get that one. So we hauled it home, set it in its stand, and I strung up the lights. Maybe tomorrow we can tackle ornaments. Here it is in the living room (at 11' or 12' tall it is looking pretty comfortable with our 18' tall ceiling).
Christmas tree
Here's a close up of the branch. Does anyone recognize it? I found out that it is incredibly prickly - I had to use my rubberized garden gloves while winding the lights through it, and my arms were covered in red dots when I was done.
Branch of our Christmas tree
They also had some beautiful little blue spruce trees, for only $15, so we picked up a second tree for our Family Room. The kids can have that as "their" tree (as long as they help me decorate the big one, too!).
Blue Spruce Christmas Tree
We may never be quite "ready" for Christmas, but little by little, we're getting closer.

Thursday, December 10, 2009

Fallen into Etsy

I keep telling myself I'll go to bed earlier one night. Tonight was looking hopeful, until my evening read of my favourite blogs led me into Etsy, where my love of art and homemade crafts pulled me deeper and deeper... If it weren't for prohibitive shipping charges on the small items, the USD to CAD exchange, and that some items don't ship into Canada, I may have placed an order by now. But did fall into a time warp - somehow time just disappeared!

Look at all the wonderful items and sellers I have discovered (photos used without explicit permission, so if any seller would like me to remove theirs - let me know).

I love dragonflies, so this vinyl decal at Wilson Graphics for $1.50 USD or 25 for $25.00 caught my attention. They also sell beautiful butterfly decals and many other designs.
Dragonfly
Designs by Kim offers 2 beaded dragonflies for $5.00 USD:
Beaded dragonflies
I took a look for any local artists, and found TamlinSky in Vancouver, who does some wonderful nature and funky monster paintings on silk. I love the vivid colours. The dragonfly card for $5.50 USD caught my attention.
Dragonfly on silk
...although what I loved even more was this 22 inch "Arbutus over Howe Sound" painting on silk, asking $200 USD:
Silk painting
Right up there with my love of dragonflies is my fascination with lizards, so this trinket bowl for $11.00 USD by My Mother's Garden caught my eye, except I would want a much bigger plate:
Lizard plate
Look at these cute crocheted gecko bookmarks by Friendlyhands, $5.00 USD and free shipping:
Crocheted geckos
So much fun! If I had more time, I would be truly inspired to create some neat stuff myself.

It's 10 minutes before midnight, so if I hurry, I can still go to bed "early".

Tuesday, December 08, 2009

The Big Western Painted Turtle Hunt

I was amused by an article in our local Burnaby (BC) newspaper, that reports that biologists have tagged all of 6 Western painted turtles in Burnaby Lake, and are using radar and sonar to detect other turtles which are already starting to hibernate. Apparently there are some 100 Western painted turtles in the lake, making it a pretty significant population for an endangered species. My first thought on reading the article was that if I had been given more than 2 months to hunt down the turtles, I would have caught & tagged a lot more than 6 of them - bare-handed - if my own turtle-hunting record is any indication. (You can read about my Western painted turtle story here.) Here's a photo of "my" turtle from last summer:
Western painted turtle
My second thought is that I'm very glad I released "my" turtle back into the lake while it was still healthy, and it could find its way back in time to settle in and hibernate last winter.

After decades of environmental debate and debate about which of the 3 levels of government would finance the dredging, I am glad to hear that there is still plans to try to restore that poor lake, which has over the years filled in, so that not much is useable by people (the strip is all that is left for the rowers, who practise in the lake year round - rain or shine or snow!). The remainder of it is mostly marsh, and even when the lake is restored by dredging, there will be quite a bit of marshy habitat available in that area for the marsh-loving creatures. So I think it should accommodate everyone. Here is a photo of the "lake" from Google Maps (click photo for a larger view):
Burnaby Lake
At the Roberts Street end, there is a boat launch and small building for the rowing club events. At the Piper Avenue side, there is a nature house, and pier/walkway to access the lake. The trail system (visible in places as white lines) encircles the lake, but when we've walked the trails before, there was little sign of any lake nearby, since the trail is surrounded by trees and low-growing bush (red osier dogwoods and such) and then marsh. What is left of the actual lake is overgrown by waterlilies, so thick that it is hard to paddle a canoe through it.

Sunday, December 06, 2009

Photo Flashback

While searching for some older photos, I came upon this set from Spring 2004, so 5 1/2 years ago. We were still at our "old" house which was a 50 year old (700 s.f.) duplex, and finishing the construction of our new (4700 s.f.) house.

Here we are at the back stairs, leading from the small yard to our open parking area (click any photo for a larger view).
My sweet girl with poppies
Kids
...and on the side yard, where I discovered that the small garden between the sidewalk and west-facing wall of the duplex was great for growing cherry tomatoes - one year I had something like 18 plants. My daughter was really fond of tomatoes back then (and still is), so used to help me pick and eat bowls full of them.

My neighbour on that side had a wonderful flower and medicinal herb garden, and I enjoyed her bright yellow & orange Meconopsis cambrica (Welsh poppies) growing along the fence.
Kids with welsh poppies
Here we are at the new house, undergoing the final stages of construction and very rough landscaping.
House construction
Wow, the back yard has come a long way since this photo.
Yard under construction
Here it is in May 2009 (I don't know why I didn't take any full-yard photos this summer!).
Garden
What wonderful memories. And what a lot since then to continue to be thankful to God for - wonderful kids, beautiful house, big welcoming yard, beautiful gardens, good health, happiness, and prosperity.

Friday, December 04, 2009

Touched by Frost

The last few days have been crisp, cold, and clear. Jack Frost has magically touched the lawn, garden, nearby rooves (or roofs?). Take a look at these epimedium leaves, outlined in frosty crystals (click any image for a slightly closer view):
Frosted epimedium leaves
I plan to leave the fairy house out for the Winter again. It survived the heavy snow last year. So here's hoping it will survive again.
Fairy house in frost
I love the little fairy Christmas tree with frost on it:
Frosted Christmas tree
The Gunnera is pretty much done for this year. I should flop the fallen leaves over the crown, to protect it for Winter. Next time I go out.
Gunnera in frostThese Japanese anemone leaves look pretty neat when "frosted":
Anemone leaves in frost
The new granite bench looks beautiful, but not very inviting:
Granite bench
And finally, there was some really neat frost patterns on the new soil today, they look like little icy rosettes:
Frost patterns
Frost rosettes
The landscape crew finished just in time. But the last few plants I decided I would plant in myself, and the soil surface has been frozen ever since. So finally today I got out there and finished the planting.

First step was to sink the peonies a bit deeper - you wonder what those guys were thinking, just dropping them on the soil, and pushing new soil around! Not very good for the tender buds forming for next Spring. Fortunately there was lots of soft soil underneath (not like the undiggable clay under that!), so it was easy to dig them in deeper. This is the "before" photo:
Peonies not well planted
On the other side, I was able to catch them in time, and ask them to replant deeper already:
Peonies in winter
I guess there's nothing like a few days of frost to kick a gardener in the butt, and then the clear weather to allow for planting the final potted plants and bulbs that she hadn't gotten to previously. I was really pleased with myself, that I kept going until all the plants I am aware of, and all my bulbs - tulips, daffs, and even the mini irises - were planted out. I can't wait to find out the result in the Spring. But finally the new garden is "done" for this year.
Garden in frost

Tuesday, December 01, 2009

Garden Project : FINAL Day 7 !!

After many rainy days, today was crisp and clear and beautiful. My landscape crew arrived in the morning, and by end of day we declared the garden project "done". I am very pleased with the result. It was definitely worth the wait.

I told my daughter it would be a "secret garden", so she is disappointed that it is so visible from the house. I tell her that by Spring, it will look very different:
Not so secret garden
If you're not already tired of my garden project, then join me as we walk up the stairs...
Stone-faced steps to upper garden
Round the corner...
Approaching the garden
...and come upon my newly renovated garden area. Suddenly this area of the garden which gave me most grief has become my favourite spot. I love the dark black soil, which the crew hauled up today. It smells very rich and earthy, and steamed as they laid it down. If all goes well, in Spring both sides will be flanked by a beautiful row of lush peonies. I will decide if I want the arbour at the entranceway. It could look good either way. I think I'm less inclined to it, seeing how beautiful it looks already with just the stones... I am now thinking of one umbrella-shaped tree in the center of the island garden, where the white stick is now, flanked by low perennials all around. Any suggestions for the tree?

Come sit down with me on the granite bench for a moment (a bit cold - okay, maybe in Spring).
Granite garden bench
Here is the garden from behind, looking back toward the house.
New garden flagstone pathway
And from the shed at the top corner of our yard. Try to ignore the pots, and the metal bench which needs to be moved out of the way - I had only a few minutes to take photos between conference calls to the office, so didn't have time to move them away:
Flagstone path viewed from the shed
We had some spare stones, so I had them placed as stepping stones along the fence, so that I could access my planter boxes (where I grow beans most years). I think they look great, too, somewhat informal but intentional.
Stepping stones in the soil
I can not wait until Spring, to see this area transform into a lush green paradise. I'm so ready for it!

Tuesday, November 24, 2009

Garden Project : Day 6

Today was a very good day for the garden project. The weather actually cooperated, it was overcast and only misty. My landscape crew showed up as promised. We made a LOT of visible progress today.

First, to lay down the stones. My landscaper was very patient with my requests to wiggle this way and that, and replace stones which I thought could be improved upon. The result was very pleasing:
Flagstones in place
Path with flagstones
Then the stones were levelled into place, and the sand poured and brushed between. My beautiful granite bench was also set into place:
Completed flagstone path
Here is a closer view of the bench. You can also see the beautiful colours in the stone.
Flagstone with granite bench
I think I prefer the bench without gravel at the base, I want to bring the soil up to it directly, and then plant a low groundcover to spread beneath it. I will try a creeping thyme first, and see how it performs in the Spring.

Here is a view from the bench looking out from the renovated garden area.
Flagstone path and granite bench
They even brought in a yard of rich garden soil today, and had time to do some planting. On the upper side, I have a row of peonies, with a row of hostas in front of them (to the outside edge, along the lawn). Where there is room, I am setting in small shrubs, to create that "secret garden" feel. To the inside of the garden, I will plant some perennials, but at this time of year, it is getting late to divide and move much there, so I will finalize the planting in the Spring.
Plantings in the secret garden border
Because I had divided the peonies, I ended up with enough to plant a shorter row on the lower side also. It will be interesting to see what it looks like, next summer.
Plantings in the secret garden
The big decision now is how to plant the inner garden. I think I will keep it low near the bench end, with some fragrant lavenders along the path, and the creeping thyme. I had earlier thought I would pair up my small Syringa Sweginzowii ("Chengfu Lilac") with 2 other lilacs, and make it a fragrance garden. But looking at it now, I enjoy the look of the stone, and bench, and don't know if I should plant so high. Instead, I could keep the center plantings low, with possibly one small (umbrella shaped?) tree in the center. It is an area which doesn't get much sun, it tends to be fairly shady. But the drainage should be good now, since we will pile up more soil to raise that area.

Any thoughts or ideas? The crew plans to visit next Tuesday to bring more soil, and finish any more planting I have for them. Then I guess that will be it until Spring, unless I want to put in lighting (I think I'd rather wait, and not feel pressured, since I don't expect to sit out there - at least not in the evenings - for the Winter).

Monday, November 23, 2009

You Go Girl!

My daughter is practising singing with a bit more expression and movement, and I'm so proud of her, I had to share her latest recording from this evening :


Here's a recording from earlier this year, which highlights her sweet voice: a vocal/piano recital.

Saturday, November 21, 2009

Stained Glass Swallowtail and Coneflower

The other day Kate of High Altitude Gardening made a comment about looking for a new winter hobby. One of the first things that came to my mind was to fiddle around with Photoshop and create "stained glass" images from the summer's garden photos. It is something I've been thinking of trying for a long time now, and I think her photo of a monarch butterfly on a zinnia hit me as one which could make a great stained glass image.

This evening I had a bit of quiet time to myself (I think the flu is trying to reclaim me, so I convinced the family to leave me at home, and I crawled back into bed for some 5 hours this afternoon). So I decided I'll try with one of my butterfly images. Here is the final product, which I'm pretty pleased with:

Stained glass swallowtail butterfly on purple coneflower
I've done a fair amount of work with Photoshop before, so was able to create this image in just over an hour. I'm happy to share my steps, and hope to inspire someone else out there to try it out, and if you do, please post me your link in the comments section, so we can all enjoy it. I am using Photoshop Elements 2.0, so the specifics may vary in a different version, but the concepts should be the same. I'd love to hear any improvements on the technique anyone discovers.

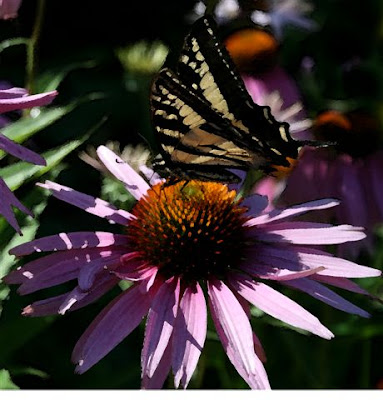
Step 1: Choose a photo. I chose this one, because there is "lots happening" in it, and several basic colours : yellow, black, green, pink/purple.
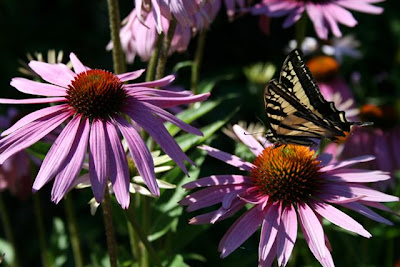
Swallowtail on coneflower
Step 2 : Crop it. I cropped to just one flower with the butterfly, and then did a "resize canvas" to add a bit more space along the bottom, so my flower petals would not be cut off.
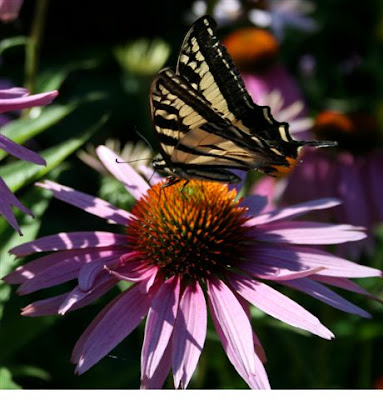
Swallowtail butterfly on coneflower
Step 3 : Check settings. You want the "RGB" colour setting (Image > Mode > select "RGB Color"). Otherwise bad things happen to your colour.

Step 4 : Add another layer, and start drawing the outline. I chose the colour black (RGB = 0,0,0), pixel size 25, opacity 100%. There is a "Layers" tab in which you can make the background visible or invisible (click the eyeball icon), and that helps to be able to check your work as you go, especially on the dark areas. I drew it in segments, so that I could Ctrl-Z (undo) any segment that didn't look good. Note that I added in my own flower bud behind. When improvising, it is useful to turn the background off.

Swallowtail image outline
After I had the image, I segmented the background, also in the same layer (originally I started another layer, but then later had to merge them together, otherwise the fill function wouldn't work properly).

Swallowtail butterfly image outline
Step 5 : Fill the colour. At this point I had the black outline on top of the original image. So I could use the "eyedropper" to select a colour from the background image, adjust it as necessary, and then use the "fill" bucket to drop colour into the appropriate sections. This went fairly quickly, and was quite rewarding. At this point, any further adjustments can be made. Such as drawing in the antenna, which I originally couldn't figure out how to represent, and only when I saw the final product I realized how I could draw them.

Step 6 : Save the image. To JPG or whatever. Save your Photoshop *.PSD file also, in case you want to come back and adjust anything, and "reprint" the image.

The other alternative is to just "play" with all the built-in filters which Photoshop provides, and see if anything turns out really neat. I explored many of them, and found some potential with these ones...

"Glowing edges" is pretty funky:
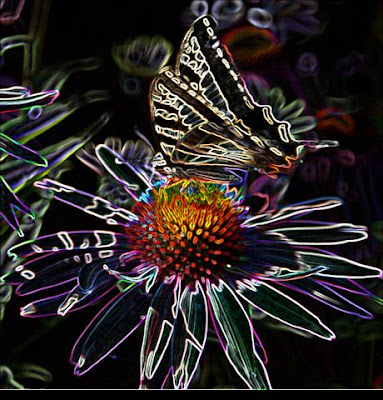
Funky Photoshopped swallowtail butterfly image
"Cutout" looks like a silk-screen image (does anyone use that technique anymore? Most everything has gone digital, even much of the professional printing):
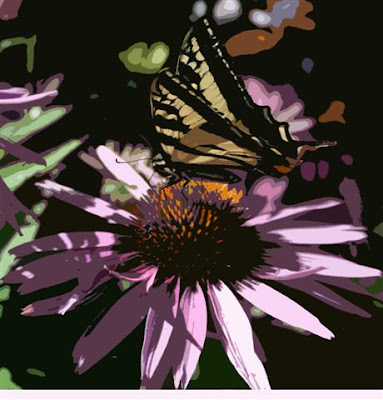
"Watercolour" had a pleasant effect:
Swallowtail butterfly painting
Okay, your turn. Be sure to send me links to your images, and any tips or techniques you can share with the rest of us.
Blog Widget by LinkWithin