Showing posts with label arts'n'crafts. Show all posts

Friday, April 10, 2015

Sidewalk Slime Art - Why Not?

Today I thought I would be planting my new Cherry Cheesecake Rhodo, and applying moss killer to the lawn (so I don't sink into wetness up to my ankles when walking through it).  But instead, I ended up connecting up the hose, and pressure washing the side walkway and driveway.

I say "pressure wash", but I don't really have a pressure washer.  But our builder did provide us with a high pressure hose bib, which is almost as good.  It doesn't clean as thoroughly or effectively, but then again I don't need to fear losing control and losing toes either.  So every 5 years or so I hire a professional, and the other years I just spray down the concrete myself, mostly to remove the sand and dirt, but also to remove the build up of slime.

I know my family doesn't care or appreciate the work I do in the yard, but every so often I wish they would at least notice.  So today I had a thought that I could leave a small section of slime, so they could at least see the "before and after".  Then I had a more creative thought, to leave it in the form of our company logo, so when we have our summer BBQ and invite everyone from our company, they would also be able to see it.  Next thing I knew, I was blasting the company logo on our sidewalk, just inside the gate, so not visible except to real visitors.

That went so well, that I followed it by a flower :
Sidewalk slime art - design by pressure washing.
...then another flower :
Sidewalk slime art - design by pressure washing.
...then some paw prints, so people wouldn't think I can only do flowers :
Sidewalk slime art - design by pressure washing.
...then some more flowers :
Sidewalk slime art - design by pressure washing.
...and finally a question mark :
Sidewalk slime art - design by pressure washing.
...since I'm sure when people see this, this will prompt the question "Why?"

The answer, of course, is "Why not?"  Why can't I have a little fun with this?  After all, if we ever get tired of the designs, we can just blast them off with the hose.  So no harm done.

Sidewalk slime art exhibit - slime on concrete - design by pressure washing.
I'm naming the whole sidewalk decoration "Why the HE77 Not?"  Since after all, isn't life meant to be enjoyed, not taken so seriously?

I then proceeded to clean off the driveway.  But I found that the new hose sprayer gave me such a precise spray line, I ended up with lots of visible lines all over the driveway (as in the photo just above also).  So I suspect I may be criticized for my poor cleaning, if anyone notices at all.

When I got to the city sidewalk, I was planning to just wash down some of the dirt, but accidentally sprayed a white line through the grime.  Oops, now I had to follow it up some real cleaning, but as with my ceramics, I decided that perhaps where I lack in skill, I can make up in creativity.  After all, my kids are still teens, and the family next door (who will walk on that bit of sidewalk more than we will) has 3 girls, all school aged, so maybe somewhere in the whole group, there will be at least one of them who notices and smiles.  Or maybe I'm just fooling myself, and I will be the only one smiling, but at least it's visible from my livingroom window, where I can enjoy it.

Sidewalk slime art exhibit - slime on concrete - design by pressure washing.
I've named this sidewalk slime art exhibit "I Was Here".  I think it fits nicely with the neighbourhood, since we are close to a greenbelt, and have lots of wildlife (coyotes, skunks, raccoons and more) walking through our yards and even on our sidewalks.

Saturday, February 22, 2014

Winter's Last Stand

We have actually had a very mild and manageable winter in Vancouver this year.  I think there was only once it snowed enough to shovel the driveway, and there were a few weeks where it was bitterly cold.  With signs of spring already popping out of the ground, it was a chance for Winter to make its last stand today.

This is the back yard after snowing for a while during the day.  It has continued to snow, and snow is in the forecast for tomorrow also.  But I think this will not last long, and Spring will soon conquer.

If you follow this blog at all, you'll notice that my posts have been noticeably absent lately.  Although I have been in a garden occasionally, I have not been very diligent about carrying my camera with me, so don't have much to show.  And for the most part, my attention has been elsewhere.  For one, I have been putting in many hours on the fursuit for my 15-year-old.  But after my first few posts (e.g. this one with the paws and tail) he has asked me not to post any of my many photos until we are completely done, which will be by next weekend since Vancoufur 2014 starts on Thursday already!  We are feverishly finishing his fursuit, and I will be happy to post after the conference.

I've also been heavy into my ceramics, which I am thoroughly enjoying.  I am posting quite regularly to my ceramics blog, but here is a few teaser photos :

In terms of indoor gardening, I've gotten hooked recently on sprouting seeds for eating (mostly in wraps).  I tried all sorts of seeds, including lentils, fenugreek, and quinoa, before buying some alfalfa seeds.  They have been the most satisfying, producing a large volume of sprouts from a very tiny amount of seeds, and in a very short timeframe.  For example, this is a jar of alfalfa only 3 days after soaking!!  I was able to harvest some already after only 2 days :
I look forward to Spring, spending more time with my garden, and posting more photos to this blog.

Wednesday, October 16, 2013

Fimo Mickey Mouse

I recently made an attempt at making a Mickey Mouse figurine from Fimo clay.  I am probably half way there, in terms of effort, but the results are already pretty good, I think :
You can read more about this, and other ceramics related adventures, on my new blog, Ceramics : It's Just Dirt.  I hope you can join me there.

Monday, September 30, 2013

Dragon Lady

Well, actually, just the dragon gloves.  But I think they turned out pretty cool :

I wasn't really planning to make dragon gloves, I was shopping for fur for my 14-year-old's rattie suit, when I spotted this wonderful shiny "black snakeskin" fabric which I couldn't resist.  Since my character is a dragon, that would be my project, if I were to build a suit - which is not my plan, just the gloves!  I'm not much for machine sewing (I don't even have a sewing machine), but I am pretty good with a needle and thread.   I designed the gloves myself, copying roughly from a pair of fleece gloves, and then I created claws and spikes from fimo clay.   Here's an earlier photo, before the fimo additions.

Here's the first paw and tail of my kiddo's rattie suit.  We've now started on the second paw, but we have quite a way to go.  The grey fur is folded up and sitting on the piano, waiting for us to tackle that.  We are designing the suit ourselves as we go along, so it is a bit daunting if I think about all the work ahead of us.  Especially the head.

Saturday, September 14, 2013

Rattie Fursuit - First Paw and Tail

Now that my son and I have decided to build a rat fursuit, much of our "spare time" is consumed with shopping for and creating parts for his suit.  In the past couple of days, we have made good progress.  We now pretty much have the first paw :

It is built on a latex-dipped gardening glove, with foam to give it the oversized finger shape, and then effectively a pink fleece glove (hand-sewn) pulled over that.  Here is just the glove with foam, before covering with the fleece :

Yes, the two middle fingers are glued together, to achieve the rattie 4 fingered paw.

Now that we know how much work went into the first paw, it will be hard to convince ourselves to move onto the next one.  :-)

Today my son went to Grandma's house to use her sewing machine to sew the tail, and then stuffed it.  I think it turned out even better than I had expected.

Next (after the second paw, hopefully), we will tackle the feet.  Then we will likely switch over to the gray fur, and start working on the body.

Friday, September 13, 2013

The World of Furry and Other Outlets for Creativity

If anyone actually follows my blog, they might notice an absence of garden-related posts recently.  It's not for the lack of stories to tell, of the abundant Italian plum harvest  (I actually had so many I discovered the joy of drying plums), the gold raspberries which are still continuing, and other delights.  I even have some photos to post, but haven't made time for it.  My attention has been turned elsewhere, into the indoor world of the Creative.

My 14 year old and I attended BronyCAN in August.  It was a great experience, to meet a whole group of My Little Pony enthusiasts, many of them young men who relate to the story's messages of friendship and loyalty and magic.  Many of them who are otherwise quite introverted, but who, within the safety of a community of likeminded Bronies, found courage to join enthusiastically in karaoke and other activities.  It was really neat to be part of that.  I was happy to show off my Twilight Sparkle costume, and had a blast making costumes with my son (who was Fluttershy) :

While at the conference, we were exposed to the world of Furry.  I found out that some people choose to dress in fursuits, not just for some miserable (and hot!) job as a mascot at an event or character in an amusement park, but as a fun way of expressing themselves and their inner fursona, in the safety and perhaps anonymity of the suit.  There is apparently a strong fursuit community in the Vancouver area, with the VancouFur convention in the spring, and the smaller Howloween event in the Fall (this year it will be Nov 2).

My son and I were both impressed by this concept, and my son has chosen his character, a yet unnamed rat.  So we have been busily shopping for furs, and reading up on techniques for building a fursuit.  We found some really wonderful grey fur and pink fleece for the hands and feet and nose.  We started sculpting and creating one hand last night.

My fursona would be a dragon.  Probably a very shiny, sparkly green and purple one, with large wings, and which can breathe puffs of black smoke.  But I have no plans to build a dragon suit, at least not at this time.  It will be more than enough to learn and help my son build a rat suit, since we are both perfectionists, and will surely spend many hours on the project.  Then I will need to be driver and assistant for him when he goes to conventions and hopefully other events.  Not to mention, I spend much of my non-working hours thinking about and reading about ceramics, looking for inspiration and collecting up anything which I can use as stampers or shapers of clay.

But while we were shopping for fabrics, I accidentally ran into some "black snakeskin" fabric which was irresistible.  So I ended up bringing it home, and spending a number of hours creating a pattern (using a simple fleece glove as an example), and sewing my dragon gloves.  Here is the first one, partly done :
The photo doesn't do the fabric justice.  It has wonderful iridescent reflections of green and purple and other colors, in a stretchy fabric which has a pretty close feel to a smooth cool snakeskin.   Anyhow, where it is now pinned along the back of the hand and arm, I have decided to put in a row of spikes.  I plan to buy and create them from purple fimo clay.  Also matching claws.  I think it will turn out pretty cool, and I will be happy to wear them to the furry conventions, but still have my hands relatively free to assist my ratty son and take photos and other neat stuff.

Saturday, August 03, 2013

Ceramics Creations - First of Many, I Hope

As my kids are now 14 and 12, and we have enough highly competent people at work that I don't need to feel responsible for everything anymore, I finally decided this summer to do something entirely for myself.  I have been wanting to learn and play with ceramics for years now, and finally signed up for a course.

It was an ideal course for me, since it was for all skill levels, not just beginners.  I find that I learn pretty quickly, so I wanted a challenge.  It was even better than my expectations.  The instructor, Sabrina, was super helpful and patient, and demonstrated and tempted us to try many different techniques.  The other students were an amazing group.  I owe so much to each of them, for their inspiration, and encouragement, and for being so open with their tips and suggestions.  I signed up for a course, but what I discovered was a community of wonderful and talented people.  I am already signed up again for another course in September, and in January also.

This is a record (probably more for me than for anyone else, and includes my glaze notes) of the many (22 !) creations which I brought home earlier this week, after my 4 week ceramics course (which was twice a week for 3 hours followed by a 4 hour workshop).  I am really pleased that I ended up with a few interesting pieces, but more importantly, each one represents a lot of learning - both of what worked and what failed.  All were made from grey stoneware.

I would love to hear from you if you enjoyed any of these.
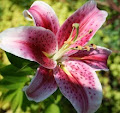
#1 and #2 - These 2 pieces are among my favorites.  They represent some of the first vases/bowls which I successfully threw on the wheel, to which I attached lily petals.  In the smaller one, I not only attached the petals, but cut out a small section of the rim (as perhaps seen in the bottom right photo).  For both pieces, the lilies were painted with Red underglaze, Clear glaze applied to them by brush, then protected by wax resist (I forgot to add spots with overglaze before doing so, since I intended for my lilies to be freckled), while the remainder of the piece was dipped in glaze.  The large one (5" across) was first filled with Copper Red, then the entire piece dipped in Matt Green, then sprayed with Clear glaze.  I like the effect of the red showing through the green on the inside.  For the smaller one (4" across), it was dipped in Matt Green then sprayed with Clear.

#3 - This little candle holder (it is spherical, with a hole cut in the bottom so that it can sit on top of a tea light) was inspired by some beautiful spherical creations which I discovered in the Czech Republic during our trip last summer, but didn't dare buy any since I couldn't imagine them surviving the trip successfully, so I took a photo to remember them.  I didn't expect to try to create my own, but I am drawn to the spherical shape, so encouraged by Sabrina, I gave it a try.  I am pretty pleased with the result, although my next ones ( :-) ) will be much bigger, since the piece heats up too quickly with a tea light inside.  I dipped it first in Amber Celadon, then in Clear.

#4, 5, 6 and 7 - These were a few little items I made for my 14 year old.  The pony is Fluttershy from My Little Pony, except that I forgot to make her wings.  For the mane & tail, I mixed Red and White underglaze to make pink.  I had inscribed the eye detail when forming the clay, and dabbed Black underglaze into the impression.  The whole piece was sprayed in a matt clear glaze (I didn't quite catch the name, it was something like Grisly Bore), since I wanted it to look like ceramic rather than shiny plastic.  Same with the little skeleton decoration, where Black underglaze was brushed and then wiped away to reveal the etchings.  The little "rat bowls" were decorated in White and Black slip, then dipped in glaze (Bamboo for the small one, and Clear for the bigger one).

#8 - It's funny, I had expected this bowl to be my favorite, but it didn't turn out as stunning as I had expected at the time (nor did I expect to fall under the spell of the wheel so soon thereafter).  It was formed from a flat sheet of clay, cut and folded to form the bowl shape.  I painted the petal edges and outside of the bowl with Red slip.  The center was a mix of Red and Yellow and maybe Brown underglazes, I believe, and then the whole piece was dipped in Clear glaze.  The result would likely have been more vibrant if a thin coat of Clear were sprayed on, since it seems to have muted the colors, and also filled in some of the textures on the inside of the petals.

#9 - This little footed cup was just an early piece thrown on the wheel, and an experiment in glazing.  I dipped the whole piece in Shino.  Then painted Liquid Latex in the 4 card suits, and dripped Matt Green and Deep Blue while held upside down, and then the Latex removed to reveal the pattern.  This is a technique I would like to explore again.

#10 - This small footed bowl is also an early piece in my throwing experience.  As you can see, I am very fond of the spherical shapes.  The wiggly decoration is Blue slip which was applied when the stoneware was already too dry.  However, the glaze helped to secure it, otherwise it was wanting to break away.  The dots are Black underglaze.  I filled/dipped the inside with Deep Blue glaze, then sprayed the whole piece with Clear glaze.

#11 - My second sphere thrown on the wheel.  This one I didn't have time to make into another candle holder, so instead experimented again with glazes.  The inside is filled with Deep Blue.  The outside was dipped in one direction in Ash Yellow, and then in the other (overlapping) with Deep Blue.  I see in my notes that I also applied some dots of #3 overglaze.  I had forgotten, and thought they were just imperfections.  (Good reason to take notes while glazing.)

#12 and 13 - These 2 bowls were the first projects in our course, allowing us to explore a number of techniques, including paper relief (e.g. the word "Love", created by Blue slip applied to a Xerox copy of the backward word, and pressed into the moist clay), direct writing, stamping, paper relief (the little triangles, protecting Black slip while the turquoise was applied overtop).  The Love/Peace/Patience/Joy bowl is inspired by my neighbor Helen.  The other one, an ikebana vase, was textured on the inside corners (as well as rolled with a pattern on the reverse side).  But now I forgot if I applied Black slip and sponged away around it, or applied white slip on top, but the texture was smoothed by the thick coat of Clear glaze resulting from dipping the piece, and only the color left behind.  If sprayed, I suspect it would have retained some of the texture too.

#14 - This is the piece which got the most attention from my classmates.  After only a short time on the wheel, I managed to throw this large container (8" across and more than 6" high).  I seem to remember I threw the bottom 2/3 first into a curved bowl, and then learned that I could throw on top of that, so continued the curve and wide rim.  I was not quite content with the shape, which was on one hand almost too perfect, yet not perfect enough for me.  So my fellow student Darlene mentioned some technique she had seen on video, where slip / soft clay was applied randomly to create texture.  I dug into the sludge bucket and created my own colored slip/slop, which I enthusiastically slapped on, and I really like the result.  The inside was dipped/filled with Matt Green.  When some of it dripped, I sponged more Matt Green on the outside to hide the drip.  The whole piece was then sprayed in Clear.  I really like the result.

$15 - This little piece I made early in the course, from rolled sections of clay, and handmade flowers.  The flowers were colored with Red underglaze.  The blue leaves were supposed to be green, from a mixture of Blue and Yellow underglaze.  The whole piece was dipped in Clear glaze, which went on a bit too thick.  If I had known, I would have sprayed it on.  The nail hole has filled in with glaze, so I don't know if I will be able to drill that out successfully?  I think I'll need to read up on that before I attempt anything.

#16 - This footed bowl was my first bowl thrown on the wheel.  It looked too ordinary so I tried fluting the edges.  I fought with cracking several times as it dried, but managed to keep the piece intact.  The rings of pink and blue were from a failed attempt at feathering (see bowl further down).  The clay was already fairly dry, so once I added rings of Red and Blue slip, they dried too quickly to do anything with them.  So instead I added some radial lines in blue slip, but then the whole thing looked too geometric, clashing with the casual shape.  So I sponged red and blue and black slip all over the surface.  I liked the effect, which I sprayed with Clear glaze.  But during the firing, it looks like that sponge pattern disappeared.  The back was dipped and brushed with Tenmoku glaze.  Pretty funky coloration there.

#17 - I really don't have any affection for this piece, but I learned a lot from my mistakes on this one.  The main pattern was created in Black slip.  Which of course didn't look black at the time, so when I squeezed on the leaf pattern in Black underglaze, I didn't realize I had picked a color which wouldn't show up.  The black areas were covered with wax resist, and the body of the pot eroded with wet sponge, to create the 3D effect.  Except I broke through the clay (bottom left photo) and needed to patch the pot from inside.  When glazing, I covered the black areas with wax again (so they are unglazed), and dipped the outside in Matt Green then sprayed Clear.  The inside was filled/dipped in Tenmoku, which came out as a rich coffee bean color.

#18 - This cylinder turned out okay.  It started with a simple rolled slab, attached to a flat base.  I covered the whole piece in & out with Turquoise slip, added the dots in Red slip, and imprinted them with the rose pattern (from a button).  The whole piece was sprayed in Clear.  I like the result, and it was quite simple to achieve.

#19 - This was the piece which was successfully feathered, but adding rings of Turquoise, Blue and White slip on the inside while the clay was still quite moist.  Then the pattern was created by pulling a small stem from the center outward.  The inside walls were Blue slip, and the outside walls are Black slip.  The whole piece was sprayed in Clear glaze.
 
#20 - This candleholders was one of my early mistakes on the wheel, prior to receiving any instruction.  I had started to form a bowl, when the whole thing collapsed.  The effect was kind of cool, and with some additional pinching, ended up being a bit rose-like.  I added a small piece in the center to hold a candle.  The piece was dipped in Copper Red glaze twice (since I didn't dip it completely the first time, so I tried again).  I like how the glaze pulls away from the edges, giving it a weathered look.  But it's not a beautiful piece, I don't think.

#21 - This one is a bit too wide to be a goblet, but is a wonderful little footed container.  If I understand my notes correctly, the inside was filled with Matt Green.  Then I realized I wanted the inside blue, so the whole piece was dipped in Deep Blue (I love that color!).  Then I turned it upside down, and dipped just the top in Matt Green.  So a bit of the blue is showing through.

#22 - I may be listing this tiny bowl last, but this is what was left over from my earliest attempts at the wheel, before receiving instruction.  I decided to let it dry anyhow, and after shrinking during bisque and glaze firings, it is pretty tiny indeed.  But it let me play with some more glazes.  I think it was drops of Black slip or underglaze on the rim.  It was dipped in Celadon completely, then the bottom part dipped in Amber Celadon.
 
For anyone who actually read down this far, you are either very interested in ceramics, are a very good friend to me, or ??? (fill in the blanks).  But thanks for reading, and please drop me a note or comment on which, if any, of these pieces you enjoyed most.
 
P.S. 5 Oct 2013 - I have just created a new blog devoted to my ceramics journey, if you have enjoyed my photos, I hope you will join me.  It is called "Ceramics : It's Just Dirt".

Sunday, July 21, 2013

All Good Things... and My Little Pony Costume

All good things really do come to an end.  (Fortunately, so do all bad things also.)  The raspberries are coming to an end.  I picked a few berries tonight, but I don't see many more on the way.

The radishes are also coming to an end.  I pulled some today, but they are getting too tough.  So I really should try planting another batch.  They were great while they lasted.  I even liked the greens - stir-fried with garlic, or just steamed/boiled.  Although the greens are fairly prickly, and it is very time-consuming to wash the grit out of them.

Grapes, apples, pears, plums, and even some blueberries, are on their way.  It has been a wonderful summer, and we have enjoyed a long stretch of hot and dry weather in Vancouver.  Sorry no garden photos, since I'm involved in so many other things, such as creating a My Little Pony costume for the BronyCAN convention coming up in another month.  I'm going as Twilight Sparkle.  My 14 year old will be Fluttershy.  Our costumes are coming along well.  I still have my mane & tail to finish, and need to attach my wings to the T-shirt.  Similar stage for Fluttershy.  Here's the bits of my costume today :
Twilight Sparkle mlp cosplay
mlp Twilight Sparkle hat headband
mlp cosplay Twilight Sparkle costume

Thursday, January 12, 2012

Another Fursona

My son doesn't think this is him, but his fursona is a wolf, and he is an avid soccer player.
My daughter's birthday party with her friends is tomorrow night, so we'll see if the girls will try this "fursona" out for themselves.  Tonight I made some cupcakes which I'll decorate tomorrow so it will be a surprise.  I hope to share some photos once they're done.

Saturday, January 07, 2012

My Fursona, or rather Scalesona

My daughter will turn 13 in another week, and she's at the wonderful age that she has all sorts of neat ideas to share with me.  So today (instead of cleaning the house, which I was also trying, but not very successful) we were exploring how to create a fursona.  She may ask her friends create them at her birthday, as a fun activity.

Fursona: A Furry Version Of Yourself


Scalesona: A Scaly Version Of Yourself

Feathersona: A Feathered Version Of Yourself

You could either pick a type of animal which you like, or associate with in personality.  Or you can take the quiz to find out what type of animal you are.  When she took the quiz, she turned out to be a small animal, such as a raccoon, or bunny or bat.  She chose the raccoon for her fursona :


I took the quiz, and found out that I am a winged creature, such as a dragon, owl or bat.  I chose the dragon, in this case as a scalesona :
 
I tried to personalize it as best I could - the dragon has my big belly, my green eyes, and shares my love of boots.
 
If you find this amusing, and take up the challenge, please let us know or send us a link to your fursona.  It would be fun to compare our results.

Thursday, May 05, 2011

More Painted Bird Houses

I have a weakness for buying and painting wooden bird houses from Michaels Arts and Crafts Store.  Unless I am actually painting with the kids (as I have done previously), most of my painting takes place after they are in bed for the night, so between 10pm and midnight.  A little while back, I painted this little cutie (below) with the windmill.  Then about two weeks ago, I bought this bigger one, and thought I would just give it a single coat of paint that night.  But I ended up continuing to paint the flowers, a different flower on each side (click any image for a slighter larger view).
Painted bird houses
Painted birdhouses
Painted bird houses
Yesterday I was shopping with the kids at Michaels, and surprised to find a whole lot of new bird houses.  I picked up two more funky shaped houses.  I promised myself I won't paint them both in one night.  I need to pace myself, and enjoy.

I use simple craft acrylic paints (in the little plastic bottles), and when done, spray it with a clear varnish.  They survive very well in the garden year round.  At least the paints do.  Look at the state of this roof, after only 1 year outside (this was not one I painted, I bought it already finished, but one day I will give it some real colour!):

Bird house with broken roof
And look at the thread-bare roof on this one (which my daughter painted 2 years ago):
Bird house with thinning roof
I've learned to pick the ones with a solid wood roof, they seem to last the best.  There are even some in the store now with metal roofs.   But then that would be one less part to paint, so where's the fun in that?
Blog Widget by LinkWithin