Wednesday, December 27, 2006

Recipe : Candied Orange Peel

This Christmas I sampled my friend Lily's homemade candied orange peel, and was so impressed, I asked her for her recipe, and have already made a batch of it myself. It is surprisingly easy, and has only 3 ingredients: orange peel, sugar and water.

The recipe is from the Woman's Day Encyclopedia of Cookery Volume 2, and is loosely paraphrased here (since I didn't copy it down exactly).

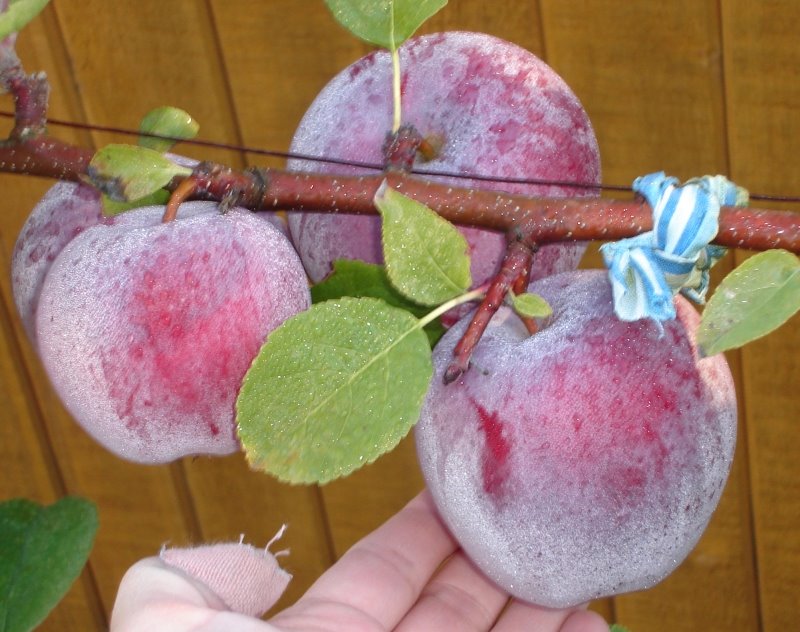
The recipe called for 2 oranges and a grapefruit, but I used 3 oranges, and I presume any citrus fruit would work, to suit one's preference.

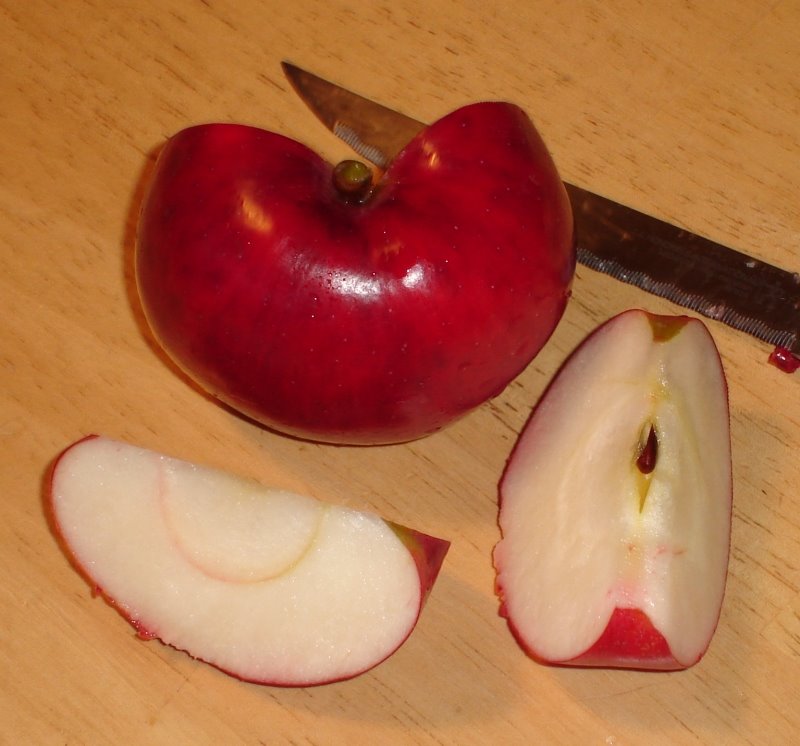
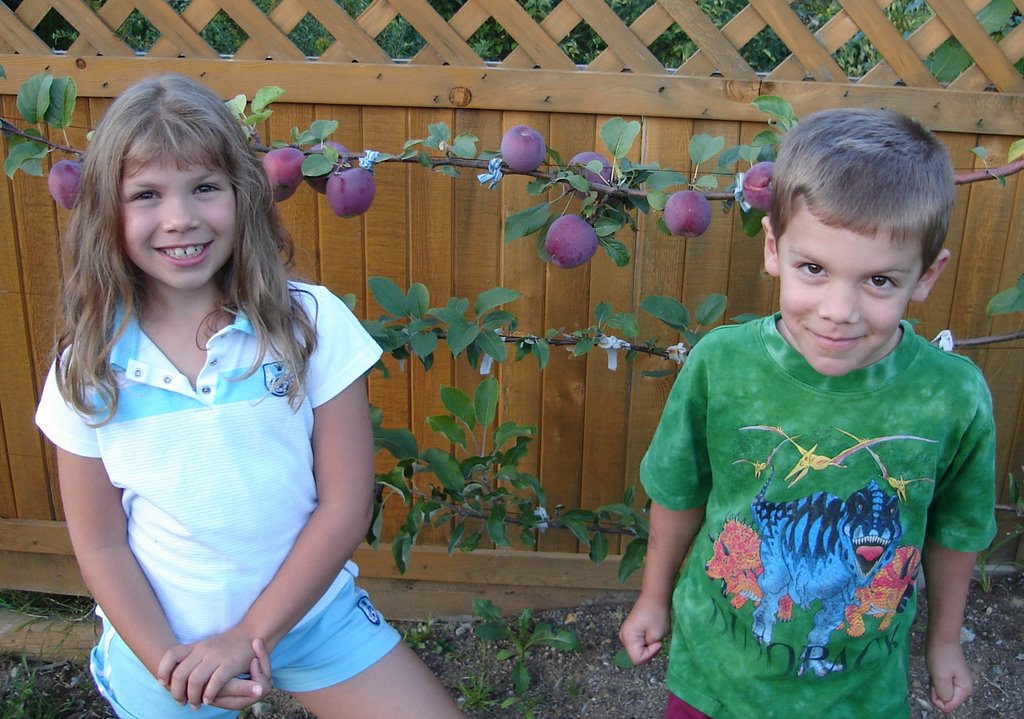
Remove the peel (I circled the orange with my knife and removed the peel in 4 quadrants), and slice it into narrow strips. I had no problem finding a use for the fruit - I had two volunteers more than happy to help with its safe disposal!

Add the strips of peel to a generous amount of water (I used my large wok frypan), bring it to a boil, and boil 5 minutes. Drain (dump out the water). Repeat this process two more times (for a total of 3 times), bringing the water to a boil for only 5 minutes each time.


Drain the orange peels on paper towels, pressing gently to remove any excess moisture. (I forgot this step, and mine came out fine, so I don't know if it adds much.)

Combine 2 cups sugar and 1 cup water (I combined it in the wok frypan while my peels were drying in the strainer - or on the paper towels), heat until the sugar is fully dissolved. Add the orange peels and bring to a full boil for 10 minutes over low heat.

Turn off heat. Cover, and let stand overnight.

Cook over low heat until most of the liquid is gone (only a thick syrup coating the peels). Watch for scorching.

Lift individual peels from the syrup, roll them in granulated sugar, and place on a tray to cool. I found that a pair of wooden chop sticks worked well for lifting them out, onto the plate of sugar. My daughter used two forks to flip the peels in the sugar, and lift them out onto the next plate.

Roll in granulated sugar a second time, placing them to dry.

Apparently, if stored in a container with a loose lid, they will last for up to 2 or 3 weeks (not that they would actually last that long, especially if you have company!).

Enjoy!

Final Caterpillar Transformation : Grey Moth

If you caught my previous posts about the 3 green-turned-grey/brown caterpillars which I found during garden cleanup in late October or early November (The Good, the Bad, and the Ugly : Brown Caterpillar and Caterpillar Transformation), then this is the happy ending to the story.

By the beginning of December, each of the 3 caterpillars had transformed into a chrysalis, and I sent 2 of them to school, to my daughter's Grade 2 classroom, to share the experience with the whole class. By the last week of school before Christmas break, I was beginning to wonder if I'd need to bring them back home. But then it happened. Dec 21, I woke to see a grey moth sitting out beside my broken chrysalis. Mine had a gimpy wing (see photo right), for no obvious reason.

The next day, Dec 22, which was the last day of class before the holidays, the class arrived to 2 moths, and set them free in the school grounds. What good timing! Although I had hoped for butterflies, or something a bit more colourful, it was rewarding to get this small glimpse into the wonder which occurs all around us everyday, often unnoticed.

Tuesday, November 28, 2006

More Fun in the Snow : Snow Bear and Snow Angel

It has certainly been a bold and early start to winter, with our foot or so of snow and -10 celsius temperatures (extremely frigid for Vancouver!!) - and it's not even December yet. In the eyes of an adult, there is the delay and peril on the roads, trees broken under the load of snow, power lines knocked out, and disruption of schedules. In the eyes of a child, there are the extra days home from school, and hours of snowmen, snow angels, snow fights, toboganning and pure delight.

I have had the privilege of enjoying both of these: the struggle to clear a walking path across the driveway, sidewalk, walkway and stairs, as well as the fun of building towering snowmen. On Sunday, I was delighted to take our kids over to our neighbours' (Helen & Bill's) yard, to play with their daughter. In addition to doing his share of shovelling and clearing pathways, Bill (he's the Mountie lookalike) worked with me on this handsome snow bear:

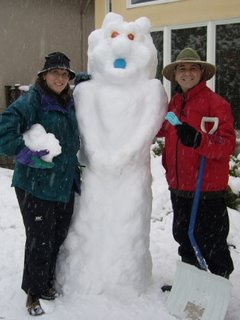
Our girls worked on a beautiful (albeit a bit grumpy looking) snow angel, complete with snow wings:
And they had fun toboganning around the yard:

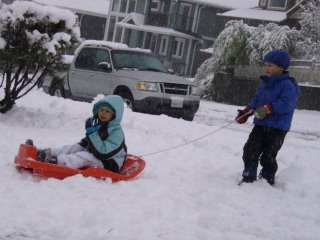
What a great way to enjoy the snow!

Caterpillar Transformation

It happened quite suddenly. The three caterpillars (see The Good, the Bad, and the Ugly : Brown Caterpillar) had stopped eating, and didn't look well at all. When they crawled, they were intent on pushing their way under the foliage I had supplied, and when they touched each other, they recoiled instantly, as if in disgust. I wondered if they objected to something I had given them to eat. They spurned even the parsley which they had previous enjoyed.

That was about 5 days ago. Since then, I had come to accept that they were either dying (in which case, they probably would not have faired any better outside under a foot of snow), or in the process of transformation. Then tonight, it happened. One of the caterpillars has split its brown skin, to reveal a golden chrysalis. Inside, there are visible eyes and legs, and what seems to be white features. It is too early to speculate, but I am pleased with this development.

The second caterpillar seems not far behind, it has been fairly immobile for a couple of days also, and is shrinking in length, as did this first one, before it shed its skin. The third one is still capable of being mobile, although spends its time sleeping, buried under the paper towel I provided.

Saturday, November 25, 2006

Fun in the Snow : Snow Mouse

It is exactly one month before Christmas, and we had our first snowfall today. It was significant enough, and of the good compacting variety, to make some snowmen. The big one, made by my son & I, was going to be a snow bunny, but turned out more like a snow mouse. The little one, made by my daughter, is more of a human form. It is still snowing tonight, so we'll see how long this snow keeps up!

Friday, November 17, 2006

Garden Painting Day 17 : Daylilies

Tonight I finally painted the daylilies into my garden painting (based on hemerocallis "Autumn Sun", although perhaps not exactly to scale). Now the garden is starting to feel pretty full. I'm guessing I'm 30% or 40% of the way to completion, considering I need to add flowers to the tree peony and pansies, and the final details (a few birds in the birdbath, bees, butterflies) will likely take a considerable amount of time. So far, I'm pretty pleased with the result.
I think I will tackle the cat next, I am still trying to decide what type and colour of cat to add in.

Garden Photo Website : Maureen & Glen's Gardening on the Prairies

Foxtail BarleyI was researching a plant today, I saw a wonderful photo of it in a gardening book, but haven't seen it in any gardens, that I can recall. Having researched it more, I understand why. It is Hordeum jubatum (see more modest photo right), commonly known as foxtail barley. It has large silky pinkish seedheads, quite stunning visually. It tolerates wetland conditions, which would make it suitable for some of the more "difficult" areas of my garden. However, all references to it include words like "weedy" and "invasive" - not something I should try to introduce into my garden.

During my search, I found an interesting PDF booklet on invasive species of Western Washington (which is a similar climate to our Vancouver Coastal Region), with recommendations for other non-invasive alternatives. I have to say, some of the descriptions of the alternatives were a little too rosy, I wouldn't agree that they are so wonderful in comparison, but if our runaway garden plants are going to wreck havoc in our native forests, we should at least read it and be aware, to try to avoid them in the first place, or prevent their spread.

I also encountered a WONDERFUL gardening site, by Maureen and Glen in Regina, Saskatchewan, and immediately bookmarked it! It is FULL of photos (over 1900, according to the site) of Saskatchewan native plants, grasses, annuals, and my main interest - perennials. The photos of most plants include a closeup (the kind you'd expect from a seed catalog), and then a photo of the whole plant, to see it in the context of the garden, as well a good description of the plant and growing advice. The perennials section includes a Glen's score, from 1 to 10, of how much he likes the plant, and a summary of his favourite perennials.

Each section of the site is available as framed (i.e. a column of links on the left, can click to view the photos & description on the right), or unframed (navigate through links, and hit the "Back" button to return). What a wonderful reference site! The photos are of great documentary quality - please respect their request not to reuse them without permission.

Thursday, November 16, 2006

The Good, the Bad, and the Ugly : Brown Caterpillar

I try to live by the motto "Live and let live". That includes the creatures, great and small, who share my garden with me. I don't believe in using pesticides or chemicals to kill anything. Everything has its purpose, and its place.

When it comes to sharing my garden, though, I am curious which one is Good, Bad or just plain "Ugly". :-) Not that the Bad and Ugly don't have a right to share my garden, I just want to know what they're up to when I encounter them. There are some which are known to be Good : earthworms, spiders, bees, dragonflies, ladybugs. Some whose taste for plants puts them in the Bad category : slugs, snails, aphids, grasshoppers, caterpillars. Others, whose intentions are not so obvious : beetles, sow bugs, wasps, stink bugs.

Reading up on any of these can often (not always!) clarify their eating habits, and impact on our garden. However, nothing, in my opinion, beats observation in the field, or over a period of time in a small cage. I have yet to write about the stink bugs which I accidentally brought into the house this summer, and which ended up in our observation for a number of weeks. They were pretty interesting.
Brown Caterpillar in November
A couple of weeks ago, I was cutting down and bundling my perennial sunflower, to set out for the city compost program, when I found 3 small green caterpillars. It was already late in the year, with frost overnight, and not lots of foliage available. So I decided these little guys would have at least as good, likely better, chance surviving indoors with us, in our plastic terrarium. Today, they are more than double the length, and considerably more bulky. (Interestingly, they changed colour to a grey/brown shortly after bringing them indoors.) They are eating through quite a lot of greens, all collected from the garden.

So far, I have found that they like: parsley, salmonberry leaves, butterfly bush leaves. They don't seem to like: red swiss chard (I thought they would!), peony leaves, tarragon. I am hoping they will eventually transform into a butterfly/moth, so we will find out what species we have. My Google Image searches haven't found a match yet.

Maybe one of the kids will be able to bring them into the class, to share the learning experience with their friends. I'll be sure to post, when we learn more.

In the meantime, I stumbled across a pretty interesting site, for those not too squeamish about bugs. Although the focus of the site is on pest management, I found the pest identification section to be fascinating. People post their photos of strange bugs they encounter, and entomologists and other experts provide identification. Be sure to take a look!

Friday, November 03, 2006

Mushroom Photos

Last week I passed through a park with the kids on the way to my son's soccer team photo shoot, and discovered a few dozen attractive mushrooms. I had my little digital camera along, so took a few photos. I tried to convince myself to go back again after lunch, with our serious camera (Canon EOS with pretty decent 75-100mm lens and 24-85mm lens, and flash attachment). I could have had some nice photos, but it was cold, and I couldn't motivate myself to drive there again.

The mushrooms, from what I can tell by reading, are the Amanita muscaria, a mushroom which is poisonous or hallucinogenic or perhaps both, depending on how it is prepared. Don't know, don't touch, don't experiment. Just take photos and marvel at the beauty.

We used to have 1 or 2 show up in our yard each year at the previous house. It was quite exciting to discover them; they would only be around for a week or two, and then disappear for another year. Enjoy the photos.


Friday, October 27, 2006

Garden Painting Day 16 : Patriot Hosta

After more than six weeks, I finally made some progress on my garden painting last night. Previously, I had outlined a cat and the white edges of a Patriot Hosta:

Now I filled in the hosta leaves:


And finally, after weeks of fighting with the Blogger.com site, which has been unable to upload my photos, I am hosting the images on PhotoBucket.com, and linking to them. We'll see how this goes, it will be nice to be able to add photos again.

Tuesday, October 24, 2006

Dragon Fruit

Tonight I had dinner with the kids in an Asian mall, and picked up a couple of bags of persimmons. I first tried persimmons a couple of years ago, and found that I really enjoy the nonastringent (e.g. Fuyu) varieties. They are very mild, taste somewhat like a melon or peach, soft yet crunchy, not acidic. I loved them so much, I have planted a Fuyu persimmon tree in the middle of my yard. It may be a few more years before I see any fruit from it, but I am already dreaming about that...

Tonight I saw another fruit which looked pretty interesting, so brought it home to try. Looking on the internet, I see that it is the Pitaya or Pitahaya, also known as Dragon Fruit. It is the fruit of a night-blooming cactus, in this case, the Hylocereus undatus. It is native to Mexico and South and Central America, but also cultivated in Southeast Asian countries, where these ones, I am sure, originated.

The outside appearance is pretty exotic, it really looks like the fruit of a cactus (would add a photo, except Blogger seems to be having problems with photo upload again!!!). The inside was surprising to me, it was soft, white and speckled with tiny black tasteless seeds. The texture of the flesh is very reminiscent of a kiwi fruit, except the taste is mild and sweet, not nearly as tangy as the kiwi. My daughter really liked it (and she doesn't like kiwis).

I will buy it again, but perhaps not for a little while. After I pulled it out of its plastic wrapper, I found that the stem end was covered in little foreign bugs (ha ha, would have posted a photo, but Blogger won't have it - again!!). My 7 year old daughter had the great idea to use a strip of masking tape to catch the bugs. Otherwise, it would have been near impossible to try to squish them against the soft fruit, and I couldn't take the chance to just wash them off, in case they climbed back up my drain to invade my home and garden. So after that experience, I will be more cautious when I pick the fruit, make sure I don't bring any more of these bugs home with me again.

Looking around, I also see a site called "Canadian Dragon Fruit", based in Calgary, of all places, which encourages Canadians to grow this cactus (presumably indoors), and is selling 5 different varieties. The Spring Special (?!) is $19.95 per plant, including shipping. Interesting enough, it is described as a jungle cactus instead of desert cactus, so actually needs shaded light, and more water and food than one would expect of a cactus.

Sunday, October 22, 2006

Pumpkin Carving

With Fall and the Hallowe'en season upon, what better time to get out a carving knife, and create some pumpkin faces? Our kids were delighted when their grandparents brought two good sized pumpkins yesterday, and went out in the backyard, in the brilliant sunshine, to carve faces with them. My daughter chose a cat face, and my son chose a "nasty" face. Here is the result:


The real magic of the faces, though, appears at night, with a little help from a tea light inside:

Tuesday, October 17, 2006

Plant Recycling

I am a recycling queen. When I was growing up, I would have been called a scrounge. But now recycling is fashionable, or at least the pretense of it. Some people think that recycling is washing out your old bottles and containers, and setting them out in the blue box, or setting out your old newspapers. It's much more than that. It's a lifestyle. An attitude.

I don't just "recycle", I reuse. Or at least I accumulate lots of stuff which one day could come in handy... Glass jars with screwtop lids for canning. Jars without resealable lids as give-away vases for garden flowers. Plastic takeout containers for storing leftovers or keeping cookies in the freezer. It is not so clear what uses to put to other plastic containers and lids or metal soup cans, but it doesn't stop me from stockpiling them also. Toilet paper rolls for future crafts. Campbell's labels for future church or school fundraising drives (I occasionally find someone to pass my accumulations to). I even started collecting the twist caps from milk jugs (see photo right - once I get the photo upload working!!). They are so colourful, there must be some craft (plastic quilt, anyone? milk cap necklace?) which would use those (suggestions welcome, please).

The same holds true for extra plants. There is always some home for them (and I don't just mean the compost pile!). I am proud to be part of a group of gardeners who swap our extra plants every Spring and Fall. It is a win-win-win situation for all.

For the plant donors:
  • guilt-free cleanup of the garden
  • share your favourite and very successful plants
  • meet other gardeners, make like-minded friends

For the plant recipients:

  • HUGE savings over buying from the local garden shop!!
  • plants which are proven to grow in our weather conditions (not just in a fancy catalog)
  • some of the donors are serious plant collectors, so the plants may be rare treasures (not like mine, which are often the same aggressive and near-invasive plants which I originally received from the group!)

For the plants:

  • new home, new conditions - it sure beats the compost pile!!

This year, I managed to give away 20 seedlings from my too-successful Carex Pendula grass. I did warn everyone I gave it to, that this one grows to a large size. When I received it (from a previous Swap) it fit in the palm of my hand. Two years later (I have very rich soil) it has formed a solid clump a good 3 feet across, about 2' tall, with the long, pendulus seedheads rising about 5' high and reaching out in every direction.

I have been wondering what to do, since the grass is starting to bully the coral maple next to it (see photo right - once I get the photo upload working!!). I asked Karin, an experienced gardener in our group, and she told me that she had finally removed hers from her garden, it demanded too much space, and she had to make room for other favourites. Her quiet wisdom inspired me to take the shovel to my clump this afternoon. Or at least I tried... and tried... and tried... Without chopping that clump into pieces (which would be quite a feat in itself), I don't think I have the strength to budge that monster.

Hopefully, I do have a solution. I asked the landscaper of my next door neighbour (they are just finishing their landscaping, and could use a strong plant like this monster grass, to retain the edge of their yard - the back half of their lot is a very steep ravine). Thankfully, he seems to have agreed. He will also take the remaining butterfly bushes which I propagated.

I started with one butterfly bush, which may be the common purple type, or at least it is a very vigourous growing variety. In the Spring, I pruned it hard, and stuck the 2' trimmings in the ground. Nearly all of them took, and I ended up with about a dozen small bushes this summer, all of which bloomed also. I have found homes for all of them. I don't know if I'll repeat the exercise again, next year. I think I'm running out of homes which will accept them. I have acquired, however, 3 more uncommon varieties (from my trading group), which I will be very happy to propagate, once they take off.

If you don't have any organized trading group in your area, make friends with neighbourhood gardeners. Most gardeners are happy to give away their garden extras, and a lot of good advice while they're at it. Share your duplicate plants, too. It is not only rewarding, but good insurance, too, in case of unforeseen loss.

Thursday, September 28, 2006

Garden Glimpses : Late September

Fall is my favourite time of year. What wonderful colours to enjoy in the garden. The contrast of warm sun during the day and crisp autumn nights, and fresh dew in the morning. Fresh crunchy apples and sweet pears to enjoy. Brilliant reds, falling leaves. What a wonderful time of the year!
perennial sunflower and virginia creeper
fall blooming asters
conflower and crocosmia
dahlia
apple
apples
callicarpa in early fall
dew on espalier apples

Thursday, September 14, 2006

Mystery Apple

My mystery apple tree bore one fruit this year, which just dropped and so I had the chance to sample it tonight. I suspect it is a Macintosh or Spartan. It has a bit of tartness, and a beautiful red skin with some small amount of stripe/spot patterning in the skin. I had hoped for a Gala, but I think I will be happy with this. I'm looking forward to more apples next year!

Wednesday, September 13, 2006

Recipe : Mint Butter Cookies

A week ago, I posted one of my favourite recipes, for Tarragon Butter Cookies. Tonight I just finished baking the mint version, and I now have a new favourite!

I replaced the tarragon with mint, as suggested by Madelin Wajda, but since I didn't have mint extract, I just left out the extract altogether, and used 4 Tbsp of mint instead of 3 Tbsp. I used my Chocolate Mint, which is a lovely version of peppermint which offers a hint of After Eight mint wafers. It is a beautiful dark mint (photo right), with purple flowers, and I don't mind that it's taken over a large part of my "tea" garden, other than feeling guilty to not use it in the kitchen more often. I have some easy recipes for mint syrup, mint jelly, mint ice cream, and of course, mint tea...

Tonight I lightly greased the pans with butter, and the cookies slid out with ease. My 3 pan method worked smoothly (every 4 min: top pan out, bottom pan to top, new pan to bottom), and I found that 8 minutes was perfect for my oven (convection gas). I finished cutting, sugaring and baking (and sampling!) all 12 dozen cookies in under an hour.

Sunday, September 10, 2006

Garden Painting Day 15 : Outline of Cat and Hosta

Last night I had the pleasure of putting a few more hours into my painting after the kids were in bed. I have painted in the outline of a cat...

garden painting with outline of cat
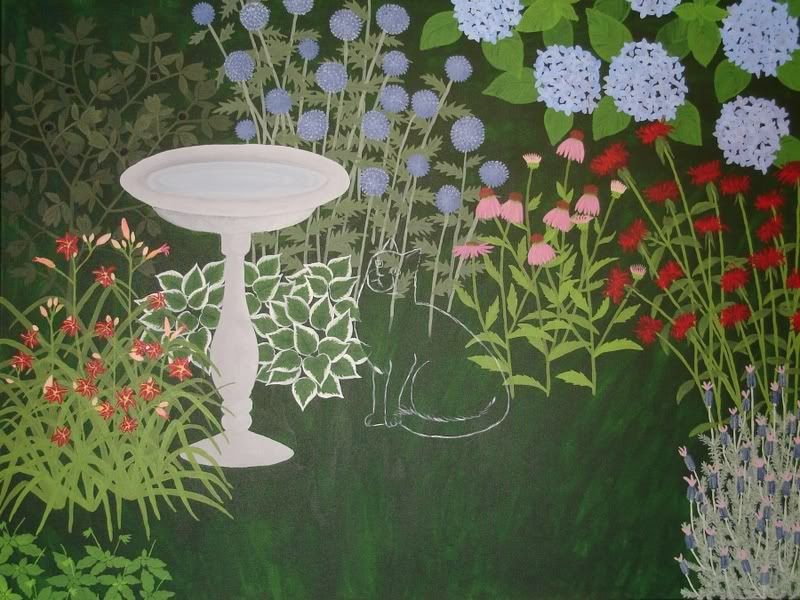
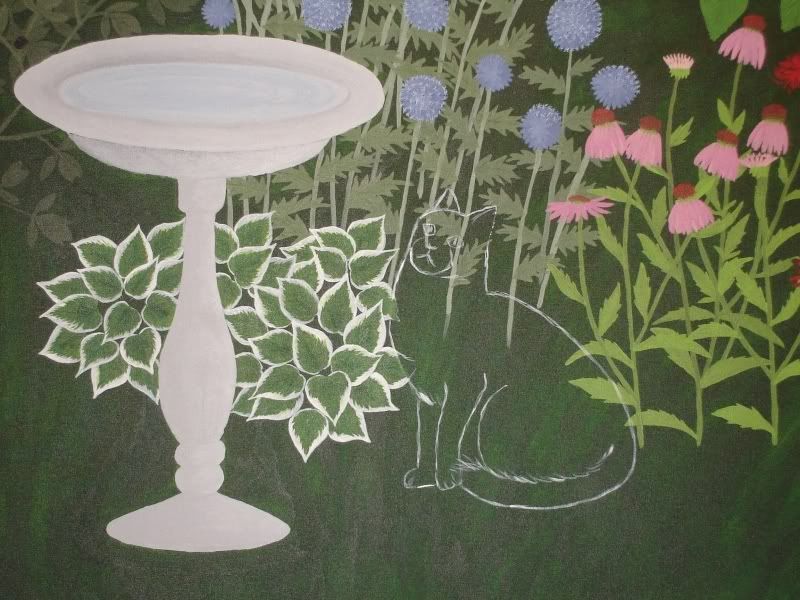
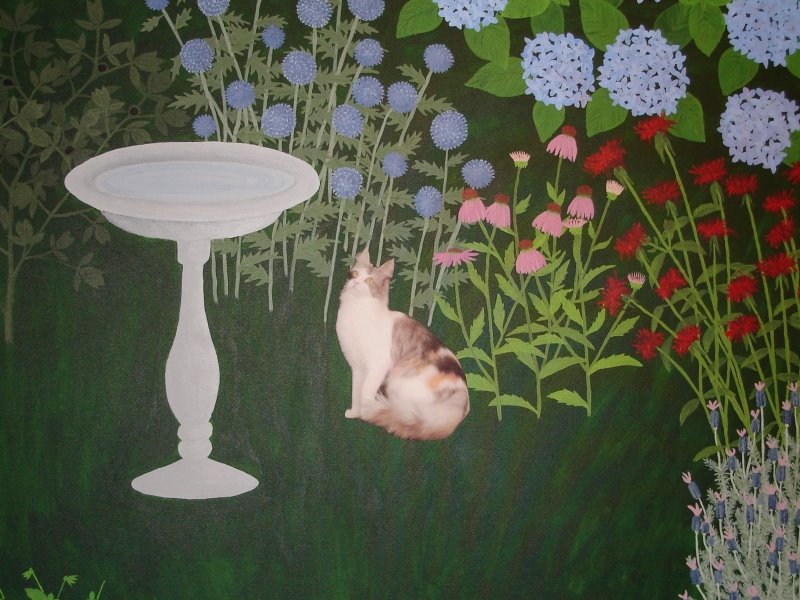
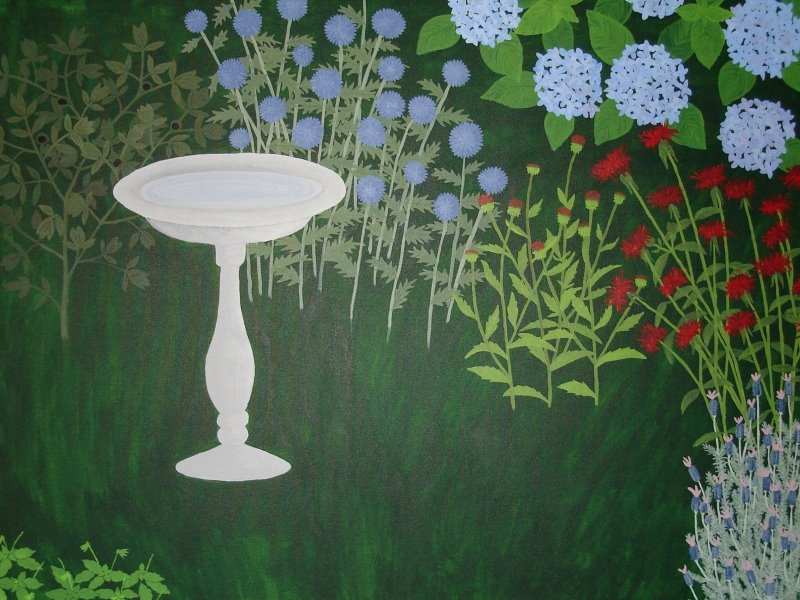
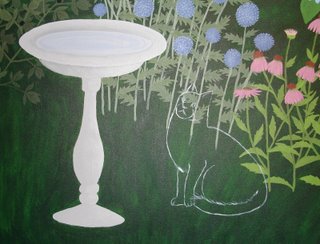
...and a group of Patriot Hosta...

garden painting with outlines of cat and hosta 
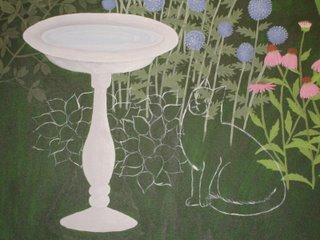
...and filled in the white outline of the Patriot Hosta.
garden painting with outlines of cat and Patriot Hosta
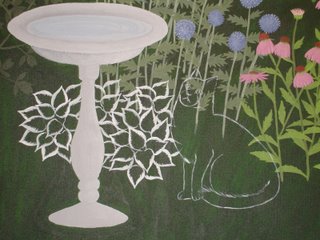
Another night, I will fill in the green centers (not as satisfying, since the background is already green, so it looks almost done already). I think I will also mix a touch of the green into white, and soften the white borders. They are currently too white.

Monday, September 04, 2006

Recipe : Tarragon Butter Cookies

This is a lovely recipe I found here last year (by Madelin Wajda of Willow Pond Farm), when the tarragon seedlings my friend Lily gave me, flourished in my small herb garden, and I turned to the internet for a tarragon recipe.

The tarragon gives the cookies small flecks of green, and a mild and pleasant herbal flavour. To my delight, the kids were crazy about them, too. With the sugar crystals on top, and the bite size portions, it makes a nice little cookie for entertaining, and a good conversation piece. I've not yet found anyone who could identify the herb in the cookie.

I would love to try making a mint version of this cookie, but I have again a good supply of tarragon in my garden, and feel obliged to use it first.

Tarragon Butter Cookies
  • 1 C butter or margarine
  • 1 C sugar
  • 1 egg
  • 1 t baking soda
  • 2 ½ C flour
  • 1 t vanilla
  • 3 T finely chopped fresh (or 1 T dried) tarragon leaves*
Cream butter and sugar, add egg and mix well. Mix in flour and baking soda, then tarragon and vanilla. Roll into two long rolls about 1 1/2 inch in diameter and refrigerate overnight. Slice into 1/8 inch slices, sprinkle with sugar, and bake at 350 degree for 10-12 minutes.

*Other herbs such as rose geranium, lemon verbena, and mint may also be used. If you do use these herbs, replace the vanilla with 1 t. of rose water, lemon extract, or mint extract, respectively.

(Makes about 5 dozen)

I've found it easier to roll the dough into 3 rolls (mine are about 16" long) or even 4 rolls (12" long), since the shorter rolls are easier to handle, and to find a tray for, when putting them in the fridge overnight. Also, instead of "sprinkling" with sugar, I cut the whole roll into disks, and then press each one top-down onto a plate of white sugar before setting it onto the cookie sheet.

I prepared my dough today, so if all goes well, I'll bake the cookies tomorrow, and then add some photos of the process, and the result.

9 Sept 2006 - I baked the cookies two nights ago, and they turned out great, as always. I end up with 12 dozen bite-sized cookies, not 5 dozen. I freeze the extras in plastic containers. This time I used ungreased non-stick pans, but they may have benefited from being slightly greased. Also, mine baked in only 8 - 10 minutes. I bake two pans at a time, but stagger the start times, so one pan is being replaced every 4-5 minutes, with the 3rd pan being prepared in between.

Tip: While cutting & preparing the dough, it helps to keep the uncut rolls of dough in the fridge, since it gets harder to handle when soft.

For some reason, I have not, after repeated tries, been able to upload photos to this post. Wierd!

Saturday, September 02, 2006

She Knows How to Grow Them

My beauties in front of my espalier apple treeI just had to show off my little beauties in the garden... I love that mischievous smile on my boy... The espalier apple tree in the background has been such a surprise and joy to me this year. I actually needed to thin the apples on the top row (Liberty apple, according to the tag), and I think I still left too many. But they seem to be ripening fine.

The second row was a different variety (Gravenstein, according to the tag), and it bore 3 apples for us this year. Not bad for the second summer. They were crisp and sweet. Two of them were damaged by what appeared to be an insect bite, but still went on to ripen nicely. I look forward to more next year.

The bottom row (Akane apple, according to the tag), didn't bear any fruit this year. I suppose this is the drawback of the horizontal cordon form of espalier - the energy for fruit production (and branch growth) is disproportionately directed at the top branches. Although the fruit production in my three levels and varieties of espalier asian pear were not so disproportionate, with each level bearing fruit.

Monday, August 28, 2006

Garden Painting Day 14 : Coneflower Petals and Globe Thistle Blooms

Garden painting with coneflower complete with petals and globe thistle in bloomI had a chance to paint last week, and I just realized tonight I hadn't posted my progress yet. So here it is (photo left), with the petals on my purple coneflower, and the tiny blooms (look like little stars) on the globe thistle.

I love the globe thistle, when it bloomed, it was a favourite of honey bees (photo right).

My friend Andrea suggested that I add a cat to my painting, since they are fascinated by bird baths. I am not a cat person, but I have been intrigued by the idea, and think I will try. Here is a "paper prototype" (although I will paint the cat to a larger scale, and perhaps different colours).

Tuesday, August 22, 2006

Peculiar Person Picks Purple Peacock Pole Beans by Pale Moonlight

Purple Peacock pole beans closeupOkay, okay, I admit I am a bit peculiar, and it wasn't actually the light of the moon, it was the artificial moonlight cast by our 300 W halogen spotlight (which does a pretty fantastic job of lighting up our 140' back yard), but I did pick Purple Peacock Pole beans tonight, long after the sun had set. What a rush! There is something very wholesomely sensual and satisfying about rustling around in the leaves, seeing only the dark - very dark - silhouettes of the long dark purple beans, and feeling the cool, smooth beans among the rough tangle of leaves and vines.

I don't know what overcame me, on my way back from turning off the sprinkler, but it had been a couple days since I've picked my Purple Peacock Pole beans, and I suddenly found myself picking beans in the light of our halogen moon. I would recommend the experience (and the beans - see my posts on buying the beans, and picking my first crop) to anyone.

Tuesday, August 15, 2006

New Favourites : "Purple Peacock" Pole Bean

Purple Peacock bean closeupPurple Peacock pole bean on the pole Last time I checked on my beans, which was maybe a week ago, there were a few tiny strings forming among the flowers. This morning I was overjoyed to pick about 2 pounds of spectacular deep purple beans. Scarlet Runner bean on the poleWow! ThPurple Peacock bean on the vineis is the first year I am growing the "Purple Peacock" pole bean, from Westcoast Seeds. As I had dreamed (see my posting about the Purple Peacock beans when I purchased the seeds), these are a real treat to the eye, as I hope some of the photos here will convey.

The leaves of the Purple Peacock are greePurple Peacock and one Scarlet Runnern, the flowers are light purple, and the stems and beans are a deep purple. The flowers are quite unnoticeable, not like the showy Scarlet Runner beans, whose red flowers (see photo) are worthy of growing for ornamental value. Although my beans had a very slow start this year (the slugs kept eating them back as they emerged from the soil), they show vigorous growth now, and look like they will be VERY productive. Unlike the Scarlet Runner (one shown on top of the Purple Peacock beans), whose beans are hairy and can get tough if allowed to mature, the Purple Peacock are long, slender, smooth and tender.

Thursday, August 10, 2006

Garden Painting Day 13 : Coneflower Stems

garden painting with coneflower stems (no petals yet) This is a really good time of year to work on my garden painting. Most of the flowers which I have chosen for subjects are in bloom now, so it is great to be able to cut a few, and bring them inside for closer observation. I cut a purple coneflower (echinacea purpurea) a couple of weeks ago, as my model, and painted in the stems & flower centers. I intended to return to paint the petals, which is the fun part, but haven't gotten to it yet. So here is the coneflower, without petals, between the globe thistle, which is only in bud (I intend to make it bloom), and the red monarda.

purple coneflower with spider webThe next morning after I brought the coneflower inside, I noticed that a tiny spider had made its web in the leaves, as you may be able to see in the photo on the right. I don't know if it has caught much, being inside the house for almost two weeks now, but it is still in its web, still on that flower. When I finally throw the flower away (it has lasted a LONG time!), I'll drop the spider in the garden.

I may not have put much paint to canvas lately, but I did take advantage of the long stretch of dry weather for a different kind of painting. One night, my husband & I went out after dinner, and stained the shed, working into the darkness to finish the job. Another night I started trimming the window, door, and railings. I'm about half way through, with a few more corner trims and the fascia boards (which will require a ladder or stool) remaining. (For some reason I am not able to post the photo!) Actually, only one quarter, since I was only applying the white primer. I should return to apply one coat of white paint... I think that will be a difficult one to find the motivation, since it already looks so smart with just the primer.

Okay, I'm really tired, I'm rambling a bit. I should try for an early evening tonight, if I can.

Sunday, August 06, 2006

Garden Glimpses : Early August

Here are some more recent photos from my garden (click any photo for slightly larger version). Sorry, can't seem to arrange them nice and square, the photo interface of Blogger is frustrating to use!

globe thistle (echinops) with beespurple sage
lily flowercrocosmia and stepslagarus ovatus (bunny tail grass)liatris undeplanting of persimmon tree
Blog Widget by LinkWithin