Wednesday, March 29, 2006

Parsley Recipe : Parsley-Walnut Pesto

Inspired by my previous post about parsley, and how it is rich in vitamins A and C, calcium, iron and beta-carotene, I decided to find a few good parsley recipes, and try something out for dinner. Not just recipes using a few teaspoons of parsley, but ones which used a significant amount of parsley, enough to qualify it as a parsley recipe.

My first thought was a tabouleh salad. There are many variations on tabouleh, the more authentic middle eastern ones having a large proportion of parsley, the western ones having a high proportion of bulgur. But I don't have bulgur on hand, and this anyhow is something which the children may not share my taste for, so I kept looking, and found the perfect recipe : parlsey-walnut pesto.

The recipe, which I found at here on the site www.care2.com, was inspired by Mediterranean Vegan Kitchen (view at Amazon.ca) (or view at Amazon.com) by Donna Klein (HP Books, 2001). Here goes:

Parsley - Walnut Pesto

  • 1/2 cup chopped walnuts, toasted (see Hint)
  • 1/4 cup extra-virgin olive oil
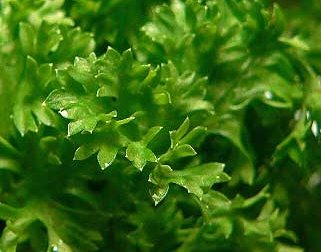
  • 1 cup packed fresh flat-leaf (Italian) parsley
  • 1/4 cup vegetable broth
  • 6 cloves garlic, peeled
  • 1 Tablespoon plain unseasoned bread crumbs
  • 1/2 teaspoon coarse salt, or to taste
  • 16 ounces spaghettini or other thin pasta

1. In a food processor fitted with a metal blade, process walnuts, oil, parsley, broth, garlic, bread crumbs, and salt until smooth.

2. Cook pasta in boiling water until al dente. Reserve 1/4 cup cooking liquid, then drain pasta in colander.

3. Place pasta in a large serving bowl and add the parsley-walnut pesto and reserved cooking liquid. Toss well to combine and serve at once. Serves 6.

Helpful Hints - To toast walnuts, bake in a single layer on a baking sheet in preheated oven at 350F for 5 minutes, stirring halfway through baking. Or heat a skillet to medium, then add nuts and cook, stirring constantly, until golden, 3 - 5 minutes. Remove from pan to cool.

I didn't have walnuts on hand, so I used pine nuts, not roasted (I'm too lazy). Also, no vegetable broth, just used water, and increased it to 1/2 cup, so that the pesto would combine in the food processor. It was a very thick consistency, and the garlic was very sharp, so I decided that it would benefit from being cooked slightly, and made into a pesto cream sauce.

parsley pesto with fusilli and shrimpsI used fusilli, my preferred pasta shape for cream sauces. I removed the tails of the jumbo shrimp, and fried them lightly in oil / butter until opaque and pink, set them aside. Sauteed chopped yellow pepper (red may have looked better) in oil and a small amount of water until soft, a few minutes. Added the pesto, and simmered for about 5 minutes. Added in cream and milk, for a creamy consistency, continued to heat until pasta was ready. Added in drained pasta and added back the shrimps, and heated for another 5 minutes, to allow some of the sauce to be absorbed. The photo shows the result. The taste was very good!

This parsley pesto will be a new favourite recipe of mine, since I always have an abundant supply of parsley in the garden, and have not had success with sweet basil (except to feed the slugs). I grew African blue basil one year, it is a beautiful plant, but for a whole season of growth, it yielded such a small amount of leaves, that I needed to add in other herbs to make one small batch of pesto.

Monday, March 27, 2006

Parsley as a Garden Ornamental

Parsley is well known as a garnish, and is very versatile in the kitchen, with very few dishes not benefitting from its flavour and colour. It is high in vitamins A and C, calcium, iron and beta-carotene. But it is quite undervalued for its ornamental quality in the garden.

In our mild Vancouver weather, parsley continues green and fresh into the winter, only mildly affected by the frost, and is early to offer new growth in Spring. This makes it worthy of not only a spot in the herb garden, but a consideration for the edge of the garden border also.

There are two familiar varieties. The regular or curly parsley (Petroselinum crispum; photo right) is a wonderful garnish, and holds its shape well when refrigerated (wrapped in a moist paper towel). The flat leafed or Italian parsley (Petroselinum neapolitanum; photo left) does not hold up as well for garnishing, but its stronger flavour suits it well to cooking. Both have great ornamental value, and add nice texture and deep green colour to the garden.

The only drawback is that parsley is a biennial, which means that in its second year, instead of offering its lush growth of leaves, it diverts its energy to sending up a tall flower head (umbrel). This may be attractive in its own funky way, but a significant diversion from the low-growing green of the previous year. If you are not interested in this effect, or in gathering seeds, the solution is to refresh the parsley patch each Spring (effectively treating the parsley as an annual). Even so, you will benefit from its greenery through the winter, when many perennials are visibly absent.

Friday, March 24, 2006

Adding "Bones" to your Garden

Winter and early Spring is a great time to evaluate the "bones" of your garden. That is, the elements of the garden which remain visible and attractive year-round. This is includes both "hardscape" structures (pathways, edging, walls, gates, arbours, benches, statues) as well as "softscape" structures : evergreen trees and shrubs.

Take a look at your garden. What structures can you identify? Are there areas lacking any visual interest? Consider introducing more "bones" to your garden.

In terms of softscaping options, there are many more options than the typical evergreen trees and shrubs (cedars, spruces, pines, junipers) Take a look around your neighbourhood. What trees and shrubs look great this time of year? These are good candidates for adding structure to your landscape.

Consider also some of the following favourites from my garden (photos taken today):

  • Variegated pieris japonicaPieris Japonica (Lily of the Valley Bush) - Many varieties to choose from, my favourite being the variegated form with creamy white flowers (see photo right).
  • Rhododendrons - There are an amazing variety to choose from, many which don't look like a "typical" rhododendron. If you have a chance to attend a rhododendron plant sale, I'd encourage you to attend.
  • Azaleas - A wide range of varieties, and many flower colours to choose from. Very showy when in bloom, often covered completely in flower.
  • Skimmia Japonica - A handsome slow-growing shrub. If a male plant is grMale skimmia japonicaown nearby, the female plant will bear bright red berries which persist all winter. The male itself (photo right), bearing upright clusters of pinkish flowers, is not only useful but attractive also.
  • Lavenders (Lavendula) - My favourite is the Spanish Lavender (lavendula stoechas), with its attractive bee-like flowers.
  • Blue oat grassBlue Oat Grass (Helictotrichon sempervirens) - The blue-grey tufts (I think of mine as little sea urchins - see photo right) may turn pale in winter, but keep their form nicely, and sway with the slightest wind.
  • California Lilacs (Ceanothus) - This family includes some 55 shrubs, many of them native to Oregon and California. The familiar fast-growing variety Ceanothus Thyrsiflorus (Blueblossom, California Lilac, or Bluebrush) is covered in a mass of blue flowers in early sChoisya ternata sundanceummer. It is a hardy and drought tolerant shrub, requiring little care.
  • Choisya (Star leaf or Mexican Orange Blossom) - My little Choisya Ternata 'Sundance' (see photo right) brightens the garden all winter, with its bright yellow foliage. The white star-like blossoms in Spring and sometimes again in Autumn are just a bonus. The shrub is worthy of a spot in the garden for the foliage alone.
  • Holly (Ilex Aquifolium) - Nice berries to brighten the winter, and the variegated form has outstanding foliage too.

Tuesday, March 21, 2006

Garden Painting Day 6 : Spanish Lavender

Lavendula stoechas - Spanish lavenderWith the pansy leaves on the bottom left corner of my painting, I started on the bottom right yesterday, with a clump of Spanish Lavender (lavendula stoechas). It was gorgeous weather yesterday, sunny and calm, and I actually took the easel (thanks to my brother John) on the deck and painted outside for a while in natural light - what a treat! Good thing I took the opportunity, the clouds had rolled in by the evening, and today was overcast with occasional showers all day.

I have now realized that it will be easier to work from top to bottom, so I can paint each successful flower on top or in front of another, rather than figure out how to paint the next flower behind this one. It is easier, though, to visualize the garden from front to back, so I'll need to do some more thinking about layout. I've already deviated from the paper layout, so I can't just follow that.
Lavendula stoechas garden painting
I also realized that I should not be hasty with adding the actual flowers. Once I was done, I realized that the foliage looked too flat or two-dimensional (photo left), and I added in highlights and shadows with two different shades (photo right). It would have been much easier if I didn't need to work around the flowers which were already painted in.

See also Garden Painting Day 5 : Pansy Leaves & Kids Projects.

Thursday, March 16, 2006

Garden Painting Day 5 : Pansy Leaves & Kids Projects

Today both of the kids were home, still on Spring Break. Neither of them were feeling too well (some sort of cough and fever which comes and goes), so we stayed home and all three of us painted this afternoon.

Rainbow coloured bird house backRainbow coloured bird house frontMy son finished the birdhouse he received from his Babi and Dedy (Czech grandparents) for his 5th birthday, with very little help from me. I was quite impressed, how he thought of the rainbow colour theme, and choose the colours with very little coaching, and persisted with two painting sessions. Last time, he did just the roof and canopy, and today the remainder. See the photo insets.

My daughter tried her hand at painting on a 5"x7" canvas board. Hers is not done yet.

I Garden painting pansy leaveswas happy to have daylight (although it wasn't a very bright day) to work on mine, this time on the kitchen island. I painted in the leaves and some stems for the pansies, wrapping the painting over the edges. I am quite impressed with the smoothness of the new paints, and how long they last on the palette without drying.

The kids are now in bed, it is still early (9 pm), and I planned to continue with the flowers, but I think I'm a bit too tired for it, somehow. I'll leave that for the next session. The flowers are the fun part, so I want to be awake enough to enjoy them.

See also Garden Painting Day 4 : Real Canvas and Acrylics.

Garden Painting Day 4 : Real Canvas and Acrylics

Yesterday I made it to Michaels to buy my 36" x 48" canvas. I bought the one with the deep (1-1/2") profile and no visible staples, so it will be hung without frame. $100 minus the 40% off a single item coupon. I also bought a set of acrylics. I chose the Grumbacher Academy Acrylics series, it seemed to be of good quality, real pigments not hues, yet still reasonably priced. I picked up the box of 6 basic colours (Burnt Sienna, Grumbacher Red, Raw Umber, Titanium White, Cadmium Yellow Medium, and Ultramarine Blue). I thought I had read that these were a non-toxic series, yet there is a warning on the box about the Cadmium Yellow and Ultramarine Blue pigments. Since my mom was with me, we were also able to get 40% off the box, regularly $28. I also picked up 3 additional tubes : the Hooker's Green, Thalo Yellow Green, and Mars Black Hue. These were on sale for 25% off the regular price of $6, so $4.50 per 3 oz / 90 ml tube.

Last night, I already started the background of the painting. I decided to use a colour straight out of the tube, not mixed, for the background, thus the Hooker's Green tube. I was pretty pleased with the texture of the paints, the box says "classic buttery texture", but it's more like a soft margarine. Smooth to apply, and doesn't dissolve much at all when the brush is dipped into water. I mixed it with a bit of water to spread it easier. I was trying to achieve full coverage of the canvas (no glaring white spots), but with a fair amount of variation in the colour density, and smooth texture (no brush strokes). The result of yesterday's efforts is shown in the photo.

I haven't decided if I want or need an easel. The two kitchen chairs are working fairly well for this, so far. Tonight I flipped the canvas upside down, to finish the bottom corners and edge (which I am painting also). I also filled in some of the lighter areas, and softened the lines of my brush lines. The two chairs may be fine for the actual painting, too. For the bottom part of the painting, laying the canvas flat on the table may also work. The lighting is not the best (since I'm always working at night), but again it may suffice.

See also Garden Painting Day 3 : Trial Canvas, New Brushes.

Friday, March 10, 2006

More Snow in March

Japanese maple under snow in March Today we awoke to more snow, this time a significant accumulation. I couldn't resist another photo of my Japanese Maple.

Well, I guess it's not officially Spring until March 20, although I had forgotten for a while, seeing the mini-daffs and crocus and other signs of spring, including seasonal allergies!

This time, there was enough snow for a good showing of snowforts at my daughter's elementary school (sorry, no photos).

Wednesday, March 08, 2006

Snow and Stamps in March

Japanese maple in light snow cover It is the 8th of March, but this morning, we received a light covering of snow. A little unusual, but refreshing, for March. It has now turned to rain, but I managed to snap a few photos of the snow, such as our Japanese Maple, with its dripping canopy of reddish branches and bed of beige croci below (a bit hard to see against the snow). Behind it is our front porch, with its Hardy Island granite. I've erased the neighbour's house to the right, with a few brush strokes. What a friendly neighbour am I. :-)

TFloral stamps from Canada Postoday the new "garden" booklet of 8 self-adhesive 51-cent stamps arrived in Canada Post outlets. I bought as many booklets as I had cash (a whopping $30!) in my wallet. I should have written "bring cash" beside the note in my calendar that the stamps were to arrive today! I will return with more cash, before they are all sold out. These are wonderful stamps, photographed by Andrew Leyerie and illustrated by Jeffrey Domm, of "shade garden", "flower garden", "water garden" and "rock garden".

On the back of the stamp booklet is a reminder that you can create stamps of your favourite photo of your own garden or favourite people, at http://www.picturepostage.ca/. A Keepsake booklet of 20 stamps and a larger photo is $24.95 + tax, less for multiple sheets ($16.00 each for 100 or more). A booklet of 40 stamps is $39.95 ($26.00 each for 100 or more, which is 65 cents per stamp). Cute idea, it would be nice for weddings or birth announcements.

Another cute idea is to create your own Custom Confetti - Made from your own photos. Pretty cool, you upload up to 30 of your favourite images, and they send you a bag of custom confetti, which includes around 3200 pieces of confetti, for $19.95 US dollars. That's 800 double-sided pieces of your photos, plus up to 3 accent colors. One bag will generously cover an 8 ft round table. This would make a great keepsake for birthdays or anniversaries. They can also be sprinkled into gift boxes or envelopes.
Blog Widget by LinkWithin