Tuesday, April 04, 2006

Horsetails in Heaven?

Every gardener has a "most hated" weed. The one that just doesn't go away, no matter how hard we try to remove it. For me, it is the horsetails.

I live on a hillside, in an area of former creekbeds. The city has, over time, diverted much of the water, but there is still plenty of underground water, and stories of natural springs in neighbours' back yards. While excavating, we encountered a small underground stream, which now runs through a few tons of gravel, under one corner of the house (deep under our crawlspace), and under our driveway. There is no sign of the water, except that one area of our driveway self-clears of snow and ice.

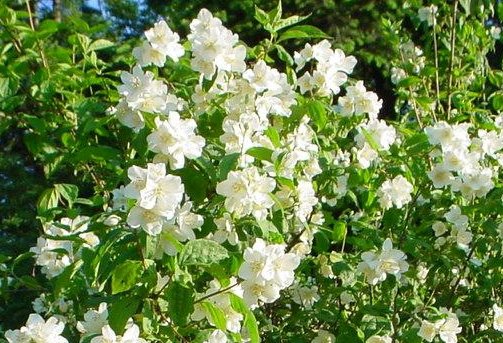
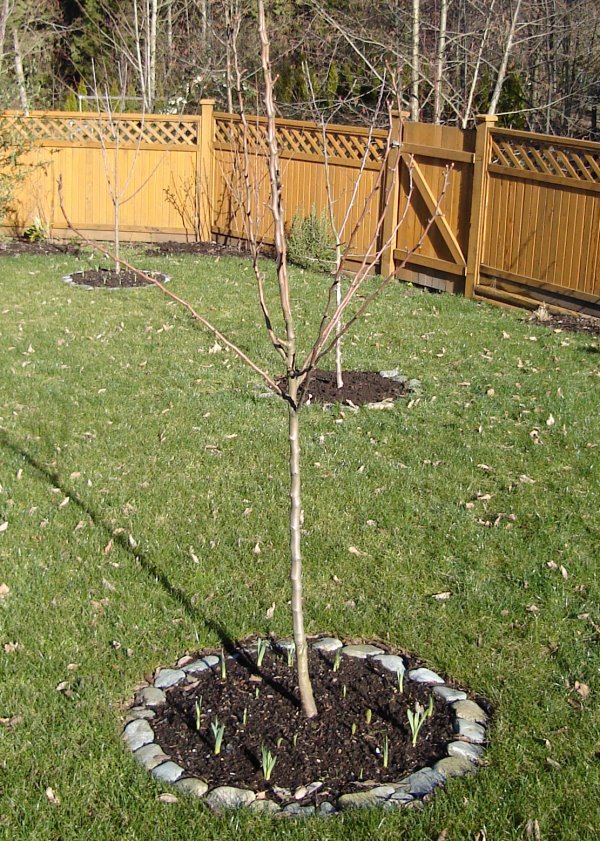
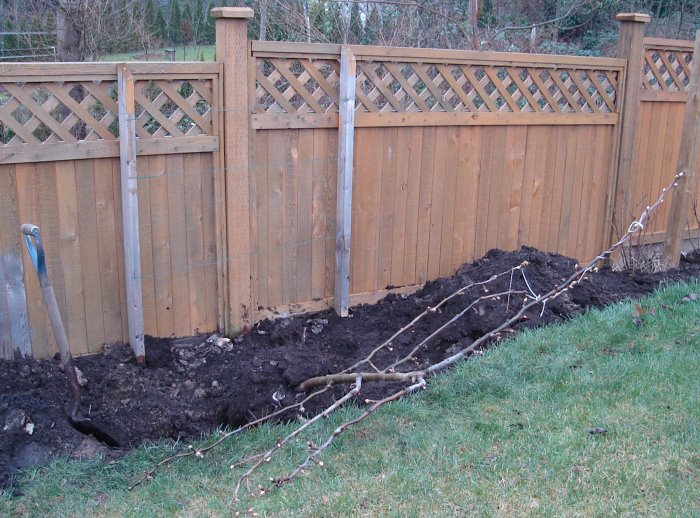
The soil here is clay, solid and unyielding to the shovel. We brought in some 8 or more truckloads of well-draining garden soil, piling it 6" to 12" deep in most of the garden areas. Into this rich soil, the garden and lawn is planted.

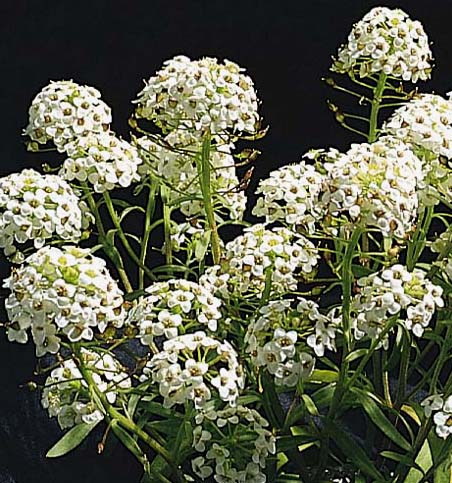
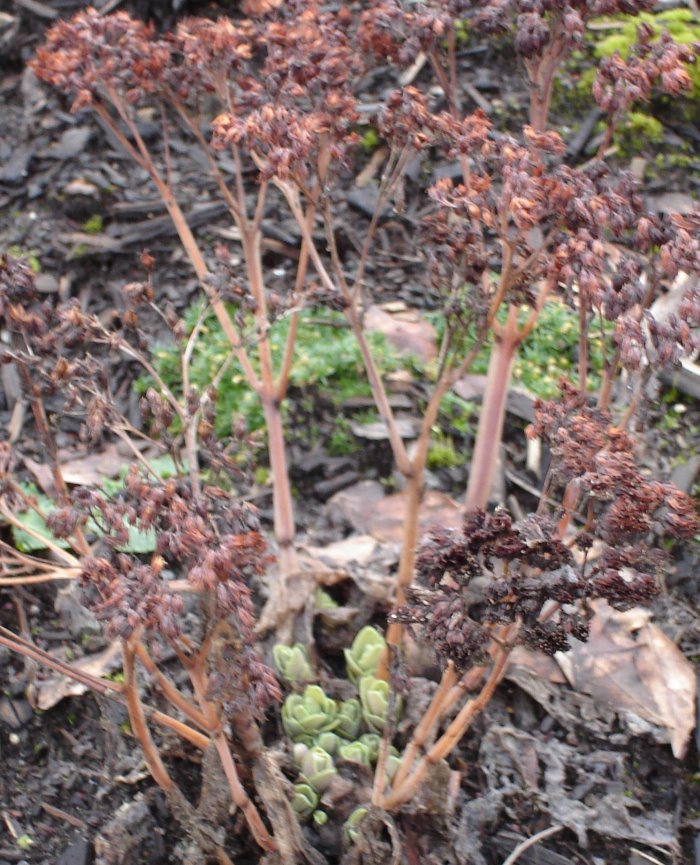
One of the native plants which inhabited this area is the horsetail. It is evident on the North side of our lot (front sidewalk), as well as on the East side (edge of a ravine), and the Southeast corner. Having survived since the time of the dinosaurs, I don't believe it is possible to completely remove it, only to manage it.
Common horsetail shoots in Spring
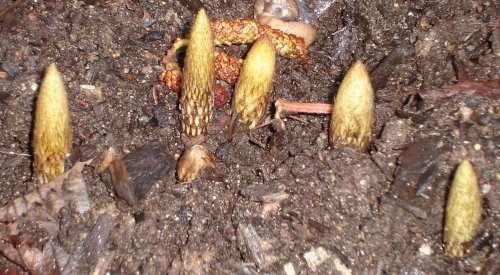
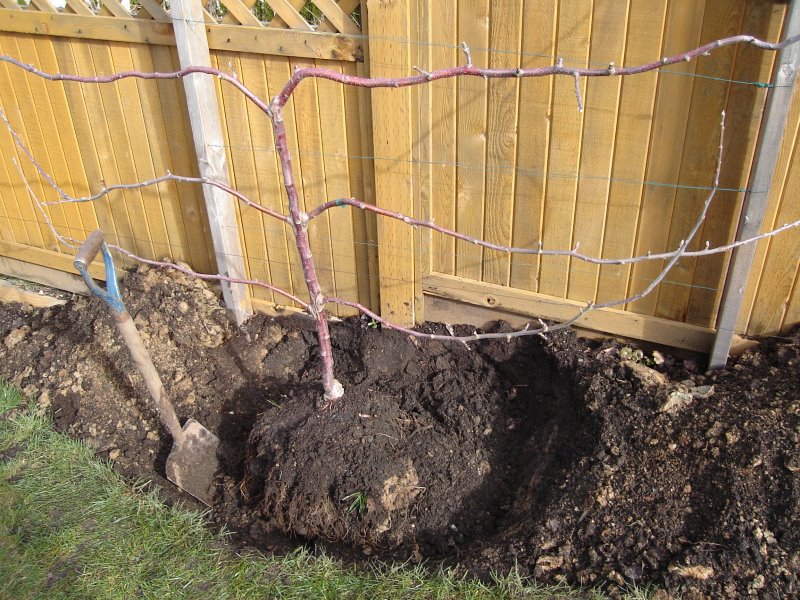
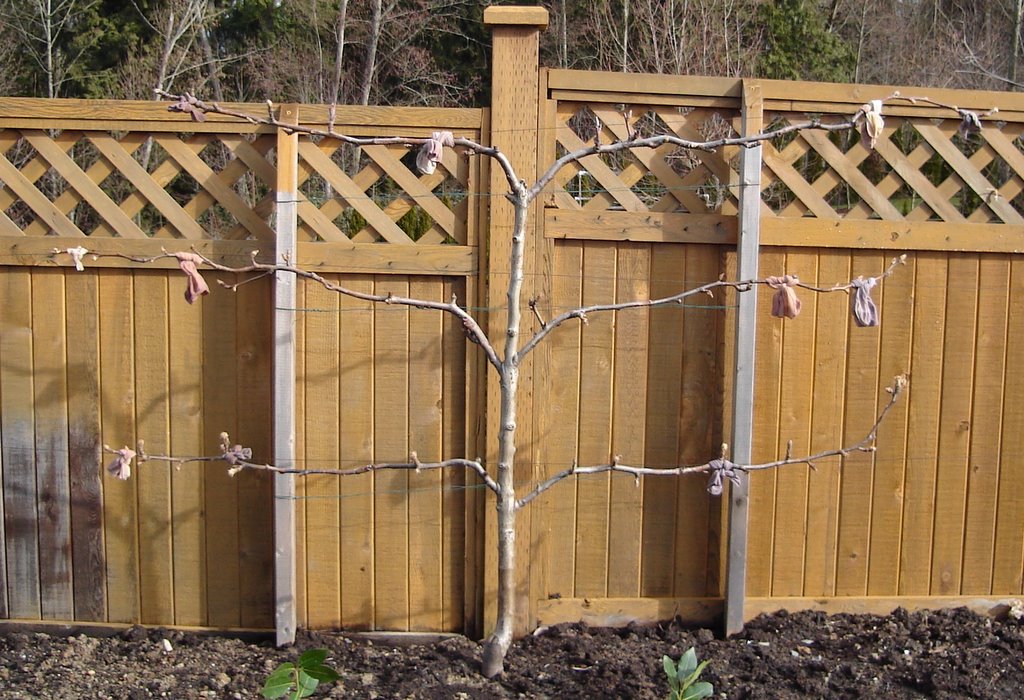
The horsetail, which I discovered underground a couple of months ago when I moved my espalier trees (along the East fence), and dug as many as I could find, is now poking through the soil. I tackled the front garden bed this morning, digging up about 50 shoots, trying to dig down beyond the shoots into the underlying root network, which is anchored in the clay subsoil. I see that it again showing through all along the East fence, and Southeast corner, so there are a few more days of digging ahead of me.

Last year, I did this same exercise twice in the growing season, each time when the horsetail shoots just cleared the surface of the soil. I believe there were some 200 or more shoots the first time I did this, so my efforts, although they seemed futile at the time, may be having some small effect.

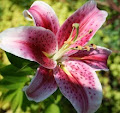
I was musing today about whether there would be horsetails in Heaven. My friend and fellow (more experienced) gardener, Irene, believes that there will be roses in Heaven, but that she will be able to enjoy their beauty without the thorns. In the same way, I believe there will also be horsetails.

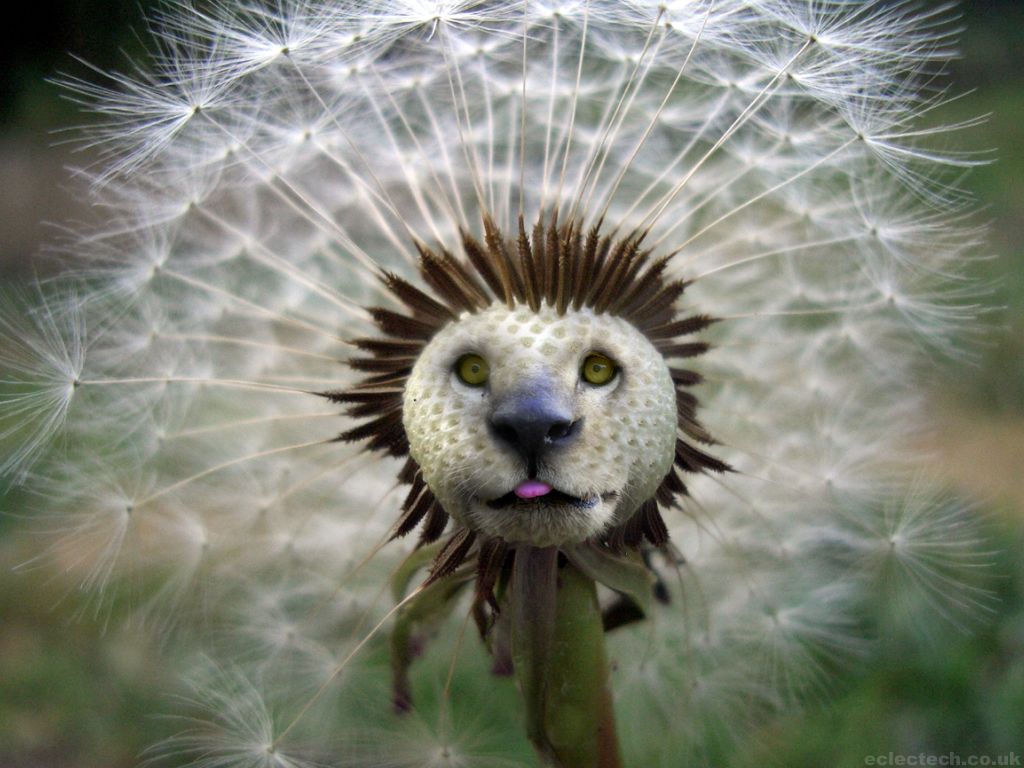
Do you remember, as a child, the wonder of gathering the spherical seedheads of dandelions, and launching all those little parachutes into the wind? My kids love to do the same, and I encourage them to blow them where they find them, not carry them home to do so! I also remember, as a child, walking along the edges of horsetail-lined ditches, imagining I was a giant walking through a miniature forest. Or imagining I was flying high above the valley, so high that the trees looked so small.

I believe that in Heaven, there will be a beautiful display of God's creation, as we already experience a glimpse of here on Earth. There will be horsetails, but they will not be seen as competing for garden space with other wonderful plants and flowers. The toiling we experience on Earth will cease. We will no longer toil to produce a beautiful garden, we will accept that all things are beautiful as they were created to be. The horsetails will have their own miniature valleys to inhabit.

Yes, in Heaven, there will be horsetails and dandelions, and we in newly-restored childlike wonder, will love to "fly" over them and blow them into the wind.

Wednesday, March 29, 2006

Parsley Recipe : Parsley-Walnut Pesto

Inspired by my previous post about parsley, and how it is rich in vitamins A and C, calcium, iron and beta-carotene, I decided to find a few good parsley recipes, and try something out for dinner. Not just recipes using a few teaspoons of parsley, but ones which used a significant amount of parsley, enough to qualify it as a parsley recipe.

My first thought was a tabouleh salad. There are many variations on tabouleh, the more authentic middle eastern ones having a large proportion of parsley, the western ones having a high proportion of bulgur. But I don't have bulgur on hand, and this anyhow is something which the children may not share my taste for, so I kept looking, and found the perfect recipe : parlsey-walnut pesto.

The recipe, which I found at here on the site www.care2.com, was inspired by Mediterranean Vegan Kitchen (view at Amazon.ca) (or view at Amazon.com) by Donna Klein (HP Books, 2001). Here goes:

Parsley - Walnut Pesto

  • 1/2 cup chopped walnuts, toasted (see Hint)
  • 1/4 cup extra-virgin olive oil
  • 1 cup packed fresh flat-leaf (Italian) parsley
  • 1/4 cup vegetable broth
  • 6 cloves garlic, peeled
  • 1 Tablespoon plain unseasoned bread crumbs
  • 1/2 teaspoon coarse salt, or to taste
  • 16 ounces spaghettini or other thin pasta

1. In a food processor fitted with a metal blade, process walnuts, oil, parsley, broth, garlic, bread crumbs, and salt until smooth.

2. Cook pasta in boiling water until al dente. Reserve 1/4 cup cooking liquid, then drain pasta in colander.

3. Place pasta in a large serving bowl and add the parsley-walnut pesto and reserved cooking liquid. Toss well to combine and serve at once. Serves 6.

Helpful Hints - To toast walnuts, bake in a single layer on a baking sheet in preheated oven at 350F for 5 minutes, stirring halfway through baking. Or heat a skillet to medium, then add nuts and cook, stirring constantly, until golden, 3 - 5 minutes. Remove from pan to cool.

I didn't have walnuts on hand, so I used pine nuts, not roasted (I'm too lazy). Also, no vegetable broth, just used water, and increased it to 1/2 cup, so that the pesto would combine in the food processor. It was a very thick consistency, and the garlic was very sharp, so I decided that it would benefit from being cooked slightly, and made into a pesto cream sauce.

parsley pesto with fusilli and shrimpsI used fusilli, my preferred pasta shape for cream sauces. I removed the tails of the jumbo shrimp, and fried them lightly in oil / butter until opaque and pink, set them aside. Sauteed chopped yellow pepper (red may have looked better) in oil and a small amount of water until soft, a few minutes. Added the pesto, and simmered for about 5 minutes. Added in cream and milk, for a creamy consistency, continued to heat until pasta was ready. Added in drained pasta and added back the shrimps, and heated for another 5 minutes, to allow some of the sauce to be absorbed. The photo shows the result. The taste was very good!

This parsley pesto will be a new favourite recipe of mine, since I always have an abundant supply of parsley in the garden, and have not had success with sweet basil (except to feed the slugs). I grew African blue basil one year, it is a beautiful plant, but for a whole season of growth, it yielded such a small amount of leaves, that I needed to add in other herbs to make one small batch of pesto.

Monday, March 27, 2006

Parsley as a Garden Ornamental

Parsley is well known as a garnish, and is very versatile in the kitchen, with very few dishes not benefitting from its flavour and colour. It is high in vitamins A and C, calcium, iron and beta-carotene. But it is quite undervalued for its ornamental quality in the garden.

In our mild Vancouver weather, parsley continues green and fresh into the winter, only mildly affected by the frost, and is early to offer new growth in Spring. This makes it worthy of not only a spot in the herb garden, but a consideration for the edge of the garden border also.

There are two familiar varieties. The regular or curly parsley (Petroselinum crispum; photo right) is a wonderful garnish, and holds its shape well when refrigerated (wrapped in a moist paper towel). The flat leafed or Italian parsley (Petroselinum neapolitanum; photo left) does not hold up as well for garnishing, but its stronger flavour suits it well to cooking. Both have great ornamental value, and add nice texture and deep green colour to the garden.

The only drawback is that parsley is a biennial, which means that in its second year, instead of offering its lush growth of leaves, it diverts its energy to sending up a tall flower head (umbrel). This may be attractive in its own funky way, but a significant diversion from the low-growing green of the previous year. If you are not interested in this effect, or in gathering seeds, the solution is to refresh the parsley patch each Spring (effectively treating the parsley as an annual). Even so, you will benefit from its greenery through the winter, when many perennials are visibly absent.

Friday, March 24, 2006

Adding "Bones" to your Garden

Winter and early Spring is a great time to evaluate the "bones" of your garden. That is, the elements of the garden which remain visible and attractive year-round. This is includes both "hardscape" structures (pathways, edging, walls, gates, arbours, benches, statues) as well as "softscape" structures : evergreen trees and shrubs.

Take a look at your garden. What structures can you identify? Are there areas lacking any visual interest? Consider introducing more "bones" to your garden.

In terms of softscaping options, there are many more options than the typical evergreen trees and shrubs (cedars, spruces, pines, junipers) Take a look around your neighbourhood. What trees and shrubs look great this time of year? These are good candidates for adding structure to your landscape.

Consider also some of the following favourites from my garden (photos taken today):

  • Variegated pieris japonicaPieris Japonica (Lily of the Valley Bush) - Many varieties to choose from, my favourite being the variegated form with creamy white flowers (see photo right).
  • Rhododendrons - There are an amazing variety to choose from, many which don't look like a "typical" rhododendron. If you have a chance to attend a rhododendron plant sale, I'd encourage you to attend.
  • Azaleas - A wide range of varieties, and many flower colours to choose from. Very showy when in bloom, often covered completely in flower.
  • Skimmia Japonica - A handsome slow-growing shrub. If a male plant is grMale skimmia japonicaown nearby, the female plant will bear bright red berries which persist all winter. The male itself (photo right), bearing upright clusters of pinkish flowers, is not only useful but attractive also.
  • Lavenders (Lavendula) - My favourite is the Spanish Lavender (lavendula stoechas), with its attractive bee-like flowers.
  • Blue oat grassBlue Oat Grass (Helictotrichon sempervirens) - The blue-grey tufts (I think of mine as little sea urchins - see photo right) may turn pale in winter, but keep their form nicely, and sway with the slightest wind.
  • California Lilacs (Ceanothus) - This family includes some 55 shrubs, many of them native to Oregon and California. The familiar fast-growing variety Ceanothus Thyrsiflorus (Blueblossom, California Lilac, or Bluebrush) is covered in a mass of blue flowers in early sChoisya ternata sundanceummer. It is a hardy and drought tolerant shrub, requiring little care.
  • Choisya (Star leaf or Mexican Orange Blossom) - My little Choisya Ternata 'Sundance' (see photo right) brightens the garden all winter, with its bright yellow foliage. The white star-like blossoms in Spring and sometimes again in Autumn are just a bonus. The shrub is worthy of a spot in the garden for the foliage alone.
  • Holly (Ilex Aquifolium) - Nice berries to brighten the winter, and the variegated form has outstanding foliage too.

Tuesday, March 21, 2006

Garden Painting Day 6 : Spanish Lavender

Lavendula stoechas - Spanish lavenderWith the pansy leaves on the bottom left corner of my painting, I started on the bottom right yesterday, with a clump of Spanish Lavender (lavendula stoechas). It was gorgeous weather yesterday, sunny and calm, and I actually took the easel (thanks to my brother John) on the deck and painted outside for a while in natural light - what a treat! Good thing I took the opportunity, the clouds had rolled in by the evening, and today was overcast with occasional showers all day.

I have now realized that it will be easier to work from top to bottom, so I can paint each successful flower on top or in front of another, rather than figure out how to paint the next flower behind this one. It is easier, though, to visualize the garden from front to back, so I'll need to do some more thinking about layout. I've already deviated from the paper layout, so I can't just follow that.
Lavendula stoechas garden painting
I also realized that I should not be hasty with adding the actual flowers. Once I was done, I realized that the foliage looked too flat or two-dimensional (photo left), and I added in highlights and shadows with two different shades (photo right). It would have been much easier if I didn't need to work around the flowers which were already painted in.

See also Garden Painting Day 5 : Pansy Leaves & Kids Projects.

Thursday, March 16, 2006

Garden Painting Day 5 : Pansy Leaves & Kids Projects

Today both of the kids were home, still on Spring Break. Neither of them were feeling too well (some sort of cough and fever which comes and goes), so we stayed home and all three of us painted this afternoon.

Rainbow coloured bird house backRainbow coloured bird house frontMy son finished the birdhouse he received from his Babi and Dedy (Czech grandparents) for his 5th birthday, with very little help from me. I was quite impressed, how he thought of the rainbow colour theme, and choose the colours with very little coaching, and persisted with two painting sessions. Last time, he did just the roof and canopy, and today the remainder. See the photo insets.

My daughter tried her hand at painting on a 5"x7" canvas board. Hers is not done yet.

I Garden painting pansy leaveswas happy to have daylight (although it wasn't a very bright day) to work on mine, this time on the kitchen island. I painted in the leaves and some stems for the pansies, wrapping the painting over the edges. I am quite impressed with the smoothness of the new paints, and how long they last on the palette without drying.

The kids are now in bed, it is still early (9 pm), and I planned to continue with the flowers, but I think I'm a bit too tired for it, somehow. I'll leave that for the next session. The flowers are the fun part, so I want to be awake enough to enjoy them.

See also Garden Painting Day 4 : Real Canvas and Acrylics.

Garden Painting Day 4 : Real Canvas and Acrylics

Yesterday I made it to Michaels to buy my 36" x 48" canvas. I bought the one with the deep (1-1/2") profile and no visible staples, so it will be hung without frame. $100 minus the 40% off a single item coupon. I also bought a set of acrylics. I chose the Grumbacher Academy Acrylics series, it seemed to be of good quality, real pigments not hues, yet still reasonably priced. I picked up the box of 6 basic colours (Burnt Sienna, Grumbacher Red, Raw Umber, Titanium White, Cadmium Yellow Medium, and Ultramarine Blue). I thought I had read that these were a non-toxic series, yet there is a warning on the box about the Cadmium Yellow and Ultramarine Blue pigments. Since my mom was with me, we were also able to get 40% off the box, regularly $28. I also picked up 3 additional tubes : the Hooker's Green, Thalo Yellow Green, and Mars Black Hue. These were on sale for 25% off the regular price of $6, so $4.50 per 3 oz / 90 ml tube.

Last night, I already started the background of the painting. I decided to use a colour straight out of the tube, not mixed, for the background, thus the Hooker's Green tube. I was pretty pleased with the texture of the paints, the box says "classic buttery texture", but it's more like a soft margarine. Smooth to apply, and doesn't dissolve much at all when the brush is dipped into water. I mixed it with a bit of water to spread it easier. I was trying to achieve full coverage of the canvas (no glaring white spots), but with a fair amount of variation in the colour density, and smooth texture (no brush strokes). The result of yesterday's efforts is shown in the photo.

I haven't decided if I want or need an easel. The two kitchen chairs are working fairly well for this, so far. Tonight I flipped the canvas upside down, to finish the bottom corners and edge (which I am painting also). I also filled in some of the lighter areas, and softened the lines of my brush lines. The two chairs may be fine for the actual painting, too. For the bottom part of the painting, laying the canvas flat on the table may also work. The lighting is not the best (since I'm always working at night), but again it may suffice.

See also Garden Painting Day 3 : Trial Canvas, New Brushes.

Friday, March 10, 2006

More Snow in March

Japanese maple under snow in March Today we awoke to more snow, this time a significant accumulation. I couldn't resist another photo of my Japanese Maple.

Well, I guess it's not officially Spring until March 20, although I had forgotten for a while, seeing the mini-daffs and crocus and other signs of spring, including seasonal allergies!

This time, there was enough snow for a good showing of snowforts at my daughter's elementary school (sorry, no photos).

Wednesday, March 08, 2006

Snow and Stamps in March

Japanese maple in light snow cover It is the 8th of March, but this morning, we received a light covering of snow. A little unusual, but refreshing, for March. It has now turned to rain, but I managed to snap a few photos of the snow, such as our Japanese Maple, with its dripping canopy of reddish branches and bed of beige croci below (a bit hard to see against the snow). Behind it is our front porch, with its Hardy Island granite. I've erased the neighbour's house to the right, with a few brush strokes. What a friendly neighbour am I. :-)

TFloral stamps from Canada Postoday the new "garden" booklet of 8 self-adhesive 51-cent stamps arrived in Canada Post outlets. I bought as many booklets as I had cash (a whopping $30!) in my wallet. I should have written "bring cash" beside the note in my calendar that the stamps were to arrive today! I will return with more cash, before they are all sold out. These are wonderful stamps, photographed by Andrew Leyerie and illustrated by Jeffrey Domm, of "shade garden", "flower garden", "water garden" and "rock garden".

On the back of the stamp booklet is a reminder that you can create stamps of your favourite photo of your own garden or favourite people, at http://www.picturepostage.ca/. A Keepsake booklet of 20 stamps and a larger photo is $24.95 + tax, less for multiple sheets ($16.00 each for 100 or more). A booklet of 40 stamps is $39.95 ($26.00 each for 100 or more, which is 65 cents per stamp). Cute idea, it would be nice for weddings or birth announcements.

Another cute idea is to create your own Custom Confetti - Made from your own photos. Pretty cool, you upload up to 30 of your favourite images, and they send you a bag of custom confetti, which includes around 3200 pieces of confetti, for $19.95 US dollars. That's 800 double-sided pieces of your photos, plus up to 3 accent colors. One bag will generously cover an 8 ft round table. This would make a great keepsake for birthdays or anniversaries. They can also be sprinkled into gift boxes or envelopes.

Tuesday, February 28, 2006

Flowering Shrubs to Hide an Ugly Fence

What do you do if you are looking at an ugly fence, the fence belongs to the neighbour, and he doesn't agree to maintain it? Ultimately, the solution may be to put up a barrier of your own.

You could start a laurel hedge or row of emerald cedars, and effectively create a living fence of your own. However, a more pleasant solution in the long run may be to create a backdrop of flowering shrubs, which may not entirely block the neighbour's fence, but will soften and brighten your property boundary, and provide year-round drama and colour. Plant smaller shrubs and perennials in front, and you have a rich, multi-textured, colourful garden border.

If space is an issue, another alternative is to set up a lattice, and introduce some colourful and quick-growing vines. There are many options, and this can be explored in another article.

In this article, we will explore some relatively fast-growing shrubs suitable to the Pacific Northwest climate, which will quickly and effectively fill an area with texture, seasonal colour and even fragrance. I would welcome you to suggest your own favourites, too.

Forsythia - The cheery yellow-flowering twigs of the forsythia are one of the early signs of Spring (February), followed by pleasant chartreuse leaves which darken in the Fall. The growth habit is untidy, but there is a raw natural beauty to the arching branches, and if desired, it can be trimmed to a hedge shape.

Buddleia davidii (Butterfly bush) - This non-native but incredibly hardy bush grows to an amazing size of 6' or more in its first year, with long flowerets which are irresistible to butterflies. The common one (which often grows wild along railway tracks, and can be seen in the hillsides along the highway heading to Horseshoe Bay) has purple flowers, but it can be found in all shades of white through purple, pinks through reds, and even orange. Photo on right of "Nanho Blue".

Viburnum opulus "Roseum" (European snowball) - What a delight to have snowballs in the middle of summer! This is a pretty bush when in bloom, and the snowballs make a nice cut flower, too.

Philadelphus lewisii (Wild mock orange) - This fast-growing bush is Idaho's state flower, and bears lovely white and very fragrant blossoms.

Weigela - These are beautiful, fast growing and hardy bushes, available in a variety of flower colours (white through red). When in bloom, they are completely covered in bell-like flowers, and attract hummingbirds. The branches can be left in their natural drooping shape, or trimmed to a hedge or standard. My favourite is the Weigela florida "Variegata", with its variegated leaves and pink flowers.

Syringa vulgaris (Lilac) - What yard could be complete without a lilac bush? There are so many options, from single flowered to double flowered, white through deep purple, pinks. The "Sensation" variety has single purple flowers outlined in white - truly sensational. Watch for fragrance, too, if you are intending to bring the flowers indoors - some varieties are more fragrant than others.

Sambucus racemosa (Red elderberry) - If you walk on the wild side, this native shrub is a nice addition, and very fast-growing. The creamy white flowers are not showy, but the red berries (which slightly poisonous to humans unless cooked) are attractive, and provide food for birds.

Sambucus nigra (Black elderberry) - Similar to the red elderberry, but its creamy white flowers make way to purplish black berries, also inedible unless cooked (so some potential for jams or wines, although I would question what quantities would be needed). There are two outstanding cultivars, the "Black Beauty" (photo on left) with its dark, almost black leaves, and pink flowers, and the "Black Lace" (photo on right) with its finely divided black leaves (resembling a Japanese split maple) and deep pink flowers.

Callicarpa bodinieri (Bodinier beautyberry) - This native of China produces outstanding clusters of vivid purple berries along the stems, which look amazing when the leaves drop in Fall, leaving behind a eye-catching purple bush! The berry-laden stems are great for cut "flower" arrangements.

Corylus avellana (Common hazel) - Although not flowering as such, this nut-producing shrub will certainly bring wildlife into the yard - very popular with squirrels and Stellar's jays! The "Contorta" (Corkscrew hazel or Contorted filbert) cultivar is popular, with its bizarre curly branches.

Other shrubs which should be considered, although not as fast-growing, but are great for middle or back of the garden border, include hydrangeas, rhododendrums, various spireas, and various viburnums.

Thursday, February 23, 2006

Moving the Espalier Apple and Asian Pear Trees

I planted the Rainier Cherry this weekend. It was cold, but since the soil was worked recently, it was easy to dig. I built up a small mound in the center of the hole, so that there would be no air trapped below the base of the tree, worked the roots in, covered it, and watered well. I had I set the whole tree within a mound, slightly above ground level, since I remember there being some slow-drainage issues in that area before the grass was established, and don't want to take any chances. If the tree needs water, it will send its roots deeper. But if it is too wet, that could spell trouble.

On TuesdayEspalier asian pear being moved, I moved our espalier Asian Pear tree, with its 3 varieties of asian pears. It's a long story, but in short, the first landscaper planted the tree 6 inches from the fence, and the second landscaper set the posts (to which to train the 3 sets of horizontal branches) at 12 inches from the fence. So being determined to make this right, against the advice of my friends and family to just let it go, I was out there, digging. It was an overcast day, warmer than the previous day (where we saw a few perfect snowflakes landing on the ground and not melting - a real treat in Vancouver, where we are used to falling slush), with a slight mist falling. Perfect for transplanting.

As I suspected, moving the tree was a two-person job, but I didn't have the second person, so I did my best. I dug around the tree, working my way in toward the rootball. There were 4 or 5 anchor roots, which I was careful to sever as far from the tree as possible.

There was a healthy root ball, about 2' across, of fine roots, which were no problem to dig around. But lifting & moving the 6" proved to be no insignificant task - there seemed to be one root which anchored it in place, even after I dug completely around it. By the end of it, I was sweaty (no, not "glowing" or perspiring, this was just plain sweat!). The upside of it, was that in the process of digging, I managed to unearth about 200 shoots of horsetail which were waiting under the surface of the soil as an unwelcome spring surprise, as well as much of the network of strong roots/runners connecting them.

Sometimes I muse about how I have managed to receive both curses from the Original Sin - pain in childbirth, and toiling over the earth. After the espalier Asian Pear, I promised myself I was not going to tackle the second espalier alone - I would be smart enough to ask for help, or hire it if required.

ToEspalier apple tree being movedday I moved the espalier Apple tree (3 varieties of apple). So much for being smarter this time! Fortunately, this one proved to be a more manageable project. Although the rootball was larger, there were no obvious anchor roots, and only a couple dozen horsetails to distract me while digging. I was hitting more clay & rocks, but somehow I managed to unearth & move this one in about half an hour, without much sweat. Good thing, since by the end of it, a fiercely cold wind had picked up.

I also finished the support structure, which consisted of 1 1/8" zinEyelet screw for espalier tree supportc eyelet hooks, 19 gauge black wire, and soft cloth / old nylons to train the branches to the wire. The eyelet hooks were fairly easy to attach to the posts, by hammering them partly in, then twisting them with pliers. I saved the last couple of turns for after the wire was attached, to tighten it. Many of the branches of the tree were already curved, from not being able to tie them down properly last year, so they needed to be tied in several places to try to straighten them out. I think the result is very pleasing, and will be better once I patch up the staining of the fence, and pull off those useless 2x4's (the second landscaper's approach to supporting the tree, which was completely inadequate for training in the espalier form, not too mention too close to the tree to tie the ends of the branches, even in the first year!) .

The first photo is tEspalier form apple treehe Apple, the seconEspalier form asian pear treed one is the Asian Pear.

Thursday, February 16, 2006

My New Rainier Cherry - At Home at Least

Yesterday I took the kids to Gardenworks, and picked up a new Rainier Cherry tree. It looks surprisingly like my original one. It was good timing, since it only came in bareroot last week. Also well timed, it happened to be the third Thursday of the month (Customer Appreciation Day), which meant that instead of picking up the cherry tree for $35, everything in the store was 15% off, so I walked out of the store with a $92 bill. Spend more, save more, right? The kids liked the free cookies, all the cute stuff in the collectibles department, and the brightly coloured seed packets. We bought our Sunflower 'Giganteus' seeds - grows 11' - 14' tall! I also bought a 25 L bag of starter soil, so I have one excuse less for not starting up my seeds.

The photo of the Rainier Cherry is courtesy of the Washington State Fruit Commission, whose Northwest Cherries site also includes a one-page summary of Northwest cherry varieties.

The weather today was gorgeous again - sunny & cold. I was completely tied up with family errands today, so my Rainier Cherry sits patiently in his pot. Hopefully tomorrow.

Sunny, Sweaty and Sad Day

I have a hard tiReplacement rainier cherry treeme letting go. Today I finally admitted to myself that my two favourite fruit trees are dead, I will replace them, and move on. (I don't remember if my Rainier Cherry and Fuyu Persimmon trees were my favourites when I first bought them, but they have been ever since I've feared their loss.)

The weather the last few days has been absolutely amazing, brilliantly sunny yet very cold (the ground is frozen in the mornings, and all day in shady areas). On my walkabout yesterday I snapped the few remaining branches on my persimmon, which on the surface appeared full & alive, but inside were dead wood. Same story with the cherry (photo right). They died last summer. I had left them in, hoping that they were just traumatized, and would find the strength to continue.

I could go on about our landscaper who, after planting the other trees in February, abandoned us, with our truckloads of soil in our upper yard (preventing the two last trees from being planted in), and how it took me months of repeatedly phoning to hear his excuse of the week, before I finally hired another landscaper to finish and turf the upper yard, and how those poor trees dropped all their leaves once they were moved to their final location in June. I could, but today is my day to let go and move on.

Young fruit trees underplanted with daffodils and tulipsI was encouraged to phone and find that the garden centre where I originally purchased them has replacement trees already in stock, and Gardenworks in Burnaby has the Rainier Cherry, and awaits the Fuyu Persimmon in about a month. Armed with that knowledge, I was happy to brave the cold and prepare both holes for the re-planting. If I'm still feeling up to it, I may even pick up the cherry after the kids come home from school today, and plant it in. If not (every time I pick up the shovel I seem to be asking for some pain in my neck or shoulders), I can rest assured that I already have a massage appointment booked for Monday morning.

The photo on left is some of my healthy trees (from front to back : Bartlett pear, mystery apple, and Lapin cherry), with daffodils and tulips poking up in the middle of their rock-edged borders.

Sunday, February 12, 2006

Garden Painting Day 3 : Trial Canvas, New Brushes

Yesterday I visited Michaels (arts & crafts store), and bought myself a set of 15 assorted brushes for $20, a small plastic palette with 10 paint wells ($1.30), and a set of three 5"x7" canvas boards ($5). I stopped short of buying artists acrylics, because this was the big-ticket item, the choices were bewildering, and I didn't have with me the notes I had made from their website (which had good descriptions but not prices!). In the store, there were prices, but not much descriptions. :-(

For my first eSmall pansy painting in progressxperiment with the 5"x7" canvas, I am using the craft acrylics which I already have, as a starting point at least. I started by filling the background with dark green. Then added foliage, and my first pansy. I will add several more pansies on top of the foliage. I will also decide which other flower to place behind the pansies. I'm thinking of painting the 4'x3' from front (bottom) to back (top), so this will be a small test of my approach. The photo shows my progress after a few hours of work.

I have learned a few techniques so far. The foliage first followed by flowers seems to work pretty nicely. When mixing up the paint colours (I have basically only the primary colours), instead of mixing them well, I crudely mix them, so I can show some colour variation with my strokes, to give a more 3-dimensional or shaded effect (I don't know if it shows up in the photo at all, perhaps I need to work on a bit more variation). The craft acrylics are quite fluid already, but to hide my brush strokes, thinning with water, and painting a second coat works really well.

I will make another attempt at investigating and purchasing a set of acrylics. Having been made aware of toxic pigments by Linda's blog, I will look for non-toxic ones. I would usually dismiss such concerns (after all, I'm not planning to eat the paints!), but I soon found out how easily it is to get the paint on my skin, and table, and then in the sink when cleaning up. Not to mention I'm using one of our drinking glasses in which to wash my brushes. With small children in the house, I won't take the chance.

Friday, February 10, 2006

Garden Painting Day 2 : Finished Paper Layout

It was a clear sunny day today, but the grPaper layout of garden painting projectound was frozen this morning, so I didn't feel guilty to spend the day indoors with my son, painting the bird house he received for his 5th birthday, and working on my garden painting layout.

I'm not being too precise about the paper layout, just getting an idea of which flowers and colours I will be using, and roughly how many I will be able to fit onto the canvas, to achieve a full-but-still-orderly garden effect. The scale of the printed flower themselves, and the colours, are not quite right, but will give me some sort of guide as I paint.

I'd love to hear any criticisms or comments on the layout. I've chosen a bird bath as a feature. I plan to add in a few birds, maybe one bathing, and one sitting on the edge. Lots of bees and butterflies, wherever I can fit them in, especially on their favourite flowers. The flower attached to the bird bath is a passionflower, I am considering painting the vine winding its way up the bird bath, so it will become part of the garden, rather than stark stone (I think I'll try for a light grey cement look) against the flowers.

Garden painting - previewing paper layout on wall
I think my garden is a bit messy, and I may end up painting a smaller variety of flowers, but in larger clumps. As I was putting it together, I became aware that I really do have a tendency toward purple and blue flowers, but I don't see this when I look from a distance - there seems to be enough colour variety.
My next step is to buy a set of acrylics, and some small canvas boards, so I can practise with a few flowers. I don't yet know if I should start from the back (top) of the garden, and work forward, or from the front (bottom) and work backward. I'd love any advice in this area, otherwise that will be something I'll need to experiment with.
See also Garden Painting Day 1 : Paper Layout.

Tuesday, February 07, 2006

Weed Management : Ground Fillers

Some of my favourite flowers are perennials which form a sizable mound of foliage at their base. Not only are these attractive, but once established, are effective at blocking weeds.

My new garden still has much spacing between plants, but over the next few years, I plan for them to spread, so that by mid-summer, there is practically no soil showing, and little chance for weeds to propagate or survive. Here are some of my favourite "ground fillers" (weed-busters):

Osteospermum - Forms a wonderful mat of green, which self-roots as it spreads, and has such attractive flowers. Stays green all winter. Read more in my osteospermum post.

Lamb's Ear (Stachys byzantina) - Forms a wonderful fuzzy silver ground-cover, with spikes of purple flowers in the late summer which are not terribly attractive to me, but adored by bees. The leaves are great in dried flower arrangements, and looking remarkably like little lamb's ears, are loved by children (including older children like me!). The flower spikes can be cut down in the Fall, and the leaves remain relatively fresh-looking all winter.

Hardy Geranium - Although there are some varieties which tend to sprawl, there are many which form a neat mound of foliage, topped by delicate flowers. My favourite is the Geranium "Victor Reiter" for its stunning burgundy and deeply split leaves, and its mass of pretty flowers which form a purple cloud above the foliage. Many of these, including "Victor Reiter", die back during the winter, but re-establish fairly quickly in spring.

Lavender - There are many varieties of lavender, but all the ones I've encountered spread reliably to form a sizable clump, remain green throughout winter, are loved by bees, have such a wonderful fragrance, and the flowers are so useful for dried arrangements or even teas or desserts.

What are some of the "ground fillers" which are attractive weed-blockers in your garden? I'd love to hear about your favourites.

Monday, February 06, 2006

Weed Management : Maintaining a Positive Attitude

There is no secret to weeding, but there is a secret to making this ongoing task an enjoyable one. The secret is to having a positive attitude toward the weeds, the garden, and the purpose of the weeding.

Here's a few thoughts which have helped me to enjoy the weeding process.

1. "One person's weed is another person's wildflower". A weed is simply a plant growing where we want a different plant to grow. Weeding is the art of removing healthy, thriving, maintenance-free plants, in favour of a less suited plant, but one which we desire to grow in our garden. A few examples:

a) I read a posting on a gardening trade bulletin board, someone in the U.S. (forgot which state) was actually requesting dandelion seeds. This was not a common plant where he lived. I happily gathered an envelope full of seeds, and shipped it to him, and I'm sure many others did also. (I couldn't resist posting this dandelion picture from the site http://eclectech.co.uk/. To a child, what flower could be more delightful, and what seed-head could be more inviting, than a dandy-lion?)

b) I had a neighbour who, due to her age and reduced mobility, seldom worked in her garden. Most people would have considered it overrun by undesirable plants or weeds. Yet she often stopped and admired, and praised the plants she was growing there.

2. There is no such thing as total elimination. Weeding is an ongoing process. There is no need to procrastinate with "I've got to get out there some time and weed the whole garden". It can be done whenever there is a little time, or whenever you are just passing by. If it is missed today, it can be pulled tomorrow, although it may require a stronger tug. If it is missed and goes to seed, then its gazillion seedlings can be pulled next season, it just may take a little longer.

3. Weeds are great food for the compost. Many of them send a taproot deep into the soil, and extract important minerals, and others contribute by fixing nitrogen (converting nitrogen in the atmosphere into a form which is useful for plant growth). However, if a weed has been allowed to flower or set seed, it may be better disposed of, than added to your compost (again, think of the gazillion seedlings).

4. Some weeds are ones which we have planted ourselves. I grew alyssum (Lobularia maritima) one year, it was a pretty annual, with its cheery clump of white flowers. I let it go to seed, and the next year, I had it sprouting throughout my garden. For me, it had become a weed. On the other hand, the same thing happened with my lobelia, and I enjoyed the cheery clumps of blue speckled throughout my garden - so far!

5. There are no mistakes with weeding. If the same plant is popping up throughout your garden, you can safely start removing it now. As a gardener, if you don't like something, there is no mistake in composting, relocating, or giving it away. If you're not sure if it's a weed for you or not, let it grow for a while longer, but keep an eye on it, and make a decision by the time it flowers - don't let it self-seed, or you're in for more work next year.

6. Weeding can be very theraputic. Some people enjoy a good game of golf. Others learn to enjoy the simple pleasure of uprooting weeds. I have found that there is no method more pleasurable - or effective - than simple hand pulling. Unless it is very soft soil, I find it useful to carry a small hand shovel / trowel in one hand, to poke below the weed, and then pull it with the other hand. If the weeds are prickly, a good garden glove helps. If not, there is some pleasure in the coolness of the plants, the grittiness of the soil, and the childlike pleasure of getting dirty.

7. Think positive thoughts. Weeds can be admired for their amazing growing abilities. "Wow, look how fast this little guy has grown!" "If only my favourite flower could self-sow like this one, I'd soon have a large patch, and could share with all my friends." Or, you can enjoy the results of your labours. "Now that I've cleared out some space, won't my favourite flowers have even more room to grow!" Don't despair about what is left to be done, enjoy what little progress you've made.

Happy weeding!

Wednesday, February 01, 2006

Mint : Lovely, useful and invasive!

The rain let up this morning, to allow a walk about the soggy yard, and some more clean up in the garden beds. It is encouraging to see new growth, such as the Sedum Spectabile "Brilliant" pictured on right, popping up below the spent blooms. With the arrival of wetter and milder weather, it seems a good time to cut down the remaining spent blooms and dried up (or rather, soggy & brown) stalks from last year's growth. During cold weather, the old growth serves as a buffer or protection for the new buds. Or, for anxious gardeners such as I, as a marker for where the perennials are located. During milder weather, it serves to harbour slugs and other pests, and is best removed.

I also discovered that I have a patch of mint establishing itself within my monarda didyma (bee balm) patch. I remember last year, the single stray stalk of mint, which was growing so close to my monarda, that it would have required digging up both to separate them. Now I may be uprooting a beautiful patch of monarda (it has spread to a lovely 2' wide mat of green) to remove the mint, which has spread by underground runners throughout the patch, and beyond.

Mint is a wonderful plant, and can be picked fresh most of the year to be used as a herbal tea (or infused into tea or hot chocolate), as a garnish, or in a variety of recipes. The dried leaves are great for mid-winter teas. The mint plant forms a wonderful patch of green, with fuzzy bee-attracting flower heads late in the summer. However, it is aggressive and should be planted with care. It would be best suited to a large container (e.g. half barrel) or planted in the "tea garden" (more on that in a later post, but the idea is a somewhat wild area, which is used primarily for harvesting and where spreading and invasive plants can enjoy some room to do what they do best).

In my first herb garden, I planted 5 varieties of mint. The following Spring I discovered what the word invasive means, and relocated it to a patch on a hillside which was bounded by a gravel parking area on one side, and an established lawn on the other. For the next five years, I continued to pull mint out of the garden (where it was originally planted), and relocate it to that patch!

My favourite mints include Chocolate Mint (Mentha xpiperata 'Chocolate Mint'), a type of peppermint with dark red-brown stalks, and smooth dark green leaves, and a purple flower (photo left). The scent is suggestive of a mint chocolate wafer. The English Mint (Mentha spicata 'English Mint') is a variety of spearmint with rich green and smooth (not hairy) leaves, and a wonderful fragrance. The Pineapple Mint (Mentha suaveolens 'Variegata') is a beautiful variegated form of Apple Mint, with a scent suggestive of ripe pineapples (photo right). It is not as vigorous as the other varieties, and may be crowded out in a mixed mint patch.

There are many other wonderfully and exotically scented mints, including Apple Mint, Orange Mint, Lemon Mint, Grapefruit Mint, and Lavender Mint. Hairy or non-hairy leaves. Peppermints or spearmints. A wonderful addition to a container garden or "tea garden", just don't let it loose into the garden!
Blog Widget by LinkWithin