This evening I had a bit of quiet time to myself (I think the flu is trying to reclaim me, so I convinced the family to leave me at home, and I crawled back into bed for some 5 hours this afternoon). So I decided I'll try with one of my butterfly images. Here is the final product, which I'm pretty pleased with:
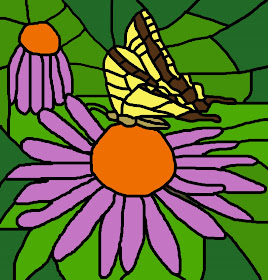
I've done a fair amount of work with Photoshop before, so was able to create this image in just over an hour. I'm happy to share my steps, and hope to inspire someone else out there to try it out, and if you do, please post me your link in the comments section, so we can all enjoy it. I am using Photoshop Elements 2.0, so the specifics may vary in a different version, but the concepts should be the same. I'd love to hear any improvements on the technique anyone discovers.
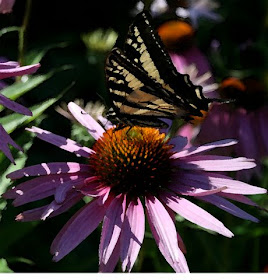
Step 1: Choose a photo. I chose this one, because there is "lots happening" in it, and several basic colours : yellow, black, green, pink/purple.
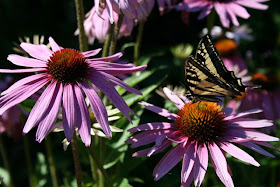
Step 2 : Crop it. I cropped to just one flower with the butterfly, and then did a "resize canvas" to add a bit more space along the bottom, so my flower petals would not be cut off.
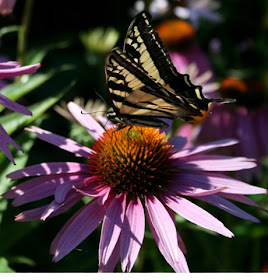
Step 3 : Check settings. You want the "RGB" colour setting (Image > Mode > select "RGB Color"). Otherwise bad things happen to your colour.
Step 4 : Add another layer, and start drawing the outline. I chose the colour black (RGB = 0,0,0), pixel size 25, opacity 100%. There is a "Layers" tab in which you can make the background visible or invisible (click the eyeball icon), and that helps to be able to check your work as you go, especially on the dark areas. I drew it in segments, so that I could Ctrl-Z (undo) any segment that didn't look good. Note that I added in my own flower bud behind. When improvising, it is useful to turn the background off.
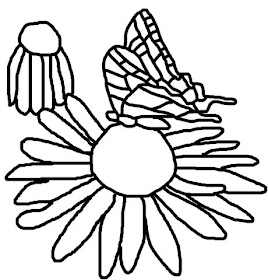
After I had the image, I segmented the background, also in the same layer (originally I started another layer, but then later had to merge them together, otherwise the fill function wouldn't work properly).
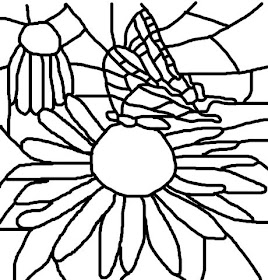
Step 5 : Fill the colour. At this point I had the black outline on top of the original image. So I could use the "eyedropper" to select a colour from the background image, adjust it as necessary, and then use the "fill" bucket to drop colour into the appropriate sections. This went fairly quickly, and was quite rewarding. At this point, any further adjustments can be made. Such as drawing in the antenna, which I originally couldn't figure out how to represent, and only when I saw the final product I realized how I could draw them.
Step 6 : Save the image. To JPG or whatever. Save your Photoshop *.PSD file also, in case you want to come back and adjust anything, and "reprint" the image.
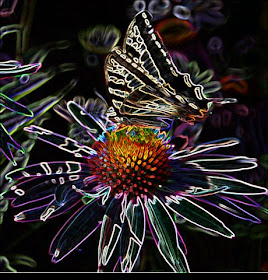
The other alternative is to just "play" with all the built-in filters which Photoshop provides, and see if anything turns out really neat. I explored many of them, and found some potential with these ones...
"Glowing edges" is pretty funky:
"Cutout" looks like a silk-screen image (does anyone use that technique anymore? Most everything has gone digital, even much of the professional printing):
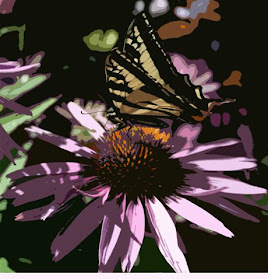
"Watercolour" had a pleasant effect:
Okay, your turn. Be sure to send me links to your images, and any tips or techniques you can share with the rest of us.

Hey! I'm in this post! :))) What a fun surprise to stop over for a visit and see this fab tutorial.
ReplyDeleteSoul sisters? I, like you, have been down with the flu. Plus, my first choice would have been the same type of photograph - a coneflower/butterfly combo. Thank you for this!!! This could keep me happily busy during my long cold winter. :D
Absolutely awesome!!! peace
ReplyDeleteThis is really fun! Thanks for showing all these steps. I don't have Photoshop, but I am "sorely tempted!" ;-) In the meantime, I'm going to bookmark this post!
ReplyDelete