Tuesday, November 24, 2009

Garden Project : Day 6

Today was a very good day for the garden project. The weather actually cooperated, it was overcast and only misty. My landscape crew showed up as promised. We made a LOT of visible progress today.

First, to lay down the stones. My landscaper was very patient with my requests to wiggle this way and that, and replace stones which I thought could be improved upon. The result was very pleasing:
Flagstones in place
Path with flagstones
Then the stones were levelled into place, and the sand poured and brushed between. My beautiful granite bench was also set into place:
Completed flagstone path
Here is a closer view of the bench. You can also see the beautiful colours in the stone.
Flagstone with granite bench
I think I prefer the bench without gravel at the base, I want to bring the soil up to it directly, and then plant a low groundcover to spread beneath it. I will try a creeping thyme first, and see how it performs in the Spring.

Here is a view from the bench looking out from the renovated garden area.
Flagstone path and granite bench
They even brought in a yard of rich garden soil today, and had time to do some planting. On the upper side, I have a row of peonies, with a row of hostas in front of them (to the outside edge, along the lawn). Where there is room, I am setting in small shrubs, to create that "secret garden" feel. To the inside of the garden, I will plant some perennials, but at this time of year, it is getting late to divide and move much there, so I will finalize the planting in the Spring.
Plantings in the secret garden border
Because I had divided the peonies, I ended up with enough to plant a shorter row on the lower side also. It will be interesting to see what it looks like, next summer.
Plantings in the secret garden
The big decision now is how to plant the inner garden. I think I will keep it low near the bench end, with some fragrant lavenders along the path, and the creeping thyme. I had earlier thought I would pair up my small Syringa Sweginzowii ("Chengfu Lilac") with 2 other lilacs, and make it a fragrance garden. But looking at it now, I enjoy the look of the stone, and bench, and don't know if I should plant so high. Instead, I could keep the center plantings low, with possibly one small (umbrella shaped?) tree in the center. It is an area which doesn't get much sun, it tends to be fairly shady. But the drainage should be good now, since we will pile up more soil to raise that area.

Any thoughts or ideas? The crew plans to visit next Tuesday to bring more soil, and finish any more planting I have for them. Then I guess that will be it until Spring, unless I want to put in lighting (I think I'd rather wait, and not feel pressured, since I don't expect to sit out there - at least not in the evenings - for the Winter).

Monday, November 23, 2009

You Go Girl!

My daughter is practising singing with a bit more expression and movement, and I'm so proud of her, I had to share her latest recording from this evening :


Here's a recording from earlier this year, which highlights her sweet voice: a vocal/piano recital.

Saturday, November 21, 2009

Stained Glass Swallowtail and Coneflower

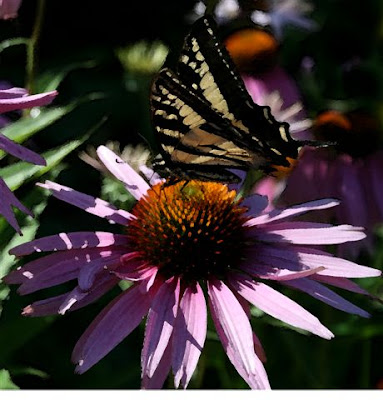
The other day Kate of High Altitude Gardening made a comment about looking for a new winter hobby. One of the first things that came to my mind was to fiddle around with Photoshop and create "stained glass" images from the summer's garden photos. It is something I've been thinking of trying for a long time now, and I think her photo of a monarch butterfly on a zinnia hit me as one which could make a great stained glass image.

This evening I had a bit of quiet time to myself (I think the flu is trying to reclaim me, so I convinced the family to leave me at home, and I crawled back into bed for some 5 hours this afternoon). So I decided I'll try with one of my butterfly images. Here is the final product, which I'm pretty pleased with:
Stained glass swallowtail butterfly on purple coneflower
I've done a fair amount of work with Photoshop before, so was able to create this image in just over an hour. I'm happy to share my steps, and hope to inspire someone else out there to try it out, and if you do, please post me your link in the comments section, so we can all enjoy it. I am using Photoshop Elements 2.0, so the specifics may vary in a different version, but the concepts should be the same. I'd love to hear any improvements on the technique anyone discovers.

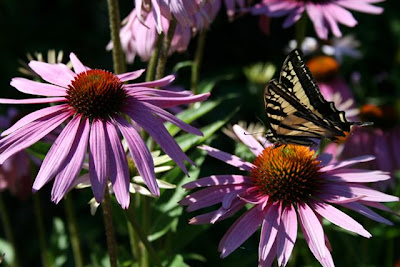
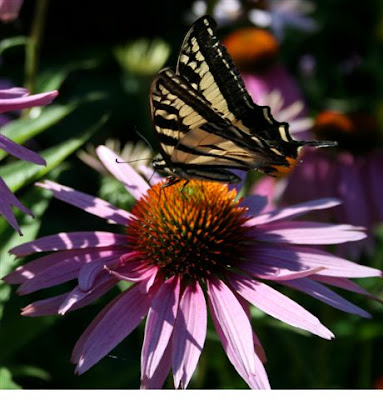
Step 1: Choose a photo. I chose this one, because there is "lots happening" in it, and several basic colours : yellow, black, green, pink/purple.
Swallowtail on coneflower
Step 2 : Crop it. I cropped to just one flower with the butterfly, and then did a "resize canvas" to add a bit more space along the bottom, so my flower petals would not be cut off.
Swallowtail butterfly on coneflower
Step 3 : Check settings. You want the "RGB" colour setting (Image > Mode > select "RGB Color"). Otherwise bad things happen to your colour.

Step 4 : Add another layer, and start drawing the outline. I chose the colour black (RGB = 0,0,0), pixel size 25, opacity 100%. There is a "Layers" tab in which you can make the background visible or invisible (click the eyeball icon), and that helps to be able to check your work as you go, especially on the dark areas. I drew it in segments, so that I could Ctrl-Z (undo) any segment that didn't look good. Note that I added in my own flower bud behind. When improvising, it is useful to turn the background off.
Swallowtail image outline
After I had the image, I segmented the background, also in the same layer (originally I started another layer, but then later had to merge them together, otherwise the fill function wouldn't work properly).
Swallowtail butterfly image outline
Step 5 : Fill the colour. At this point I had the black outline on top of the original image. So I could use the "eyedropper" to select a colour from the background image, adjust it as necessary, and then use the "fill" bucket to drop colour into the appropriate sections. This went fairly quickly, and was quite rewarding. At this point, any further adjustments can be made. Such as drawing in the antenna, which I originally couldn't figure out how to represent, and only when I saw the final product I realized how I could draw them.

Step 6 : Save the image. To JPG or whatever. Save your Photoshop *.PSD file also, in case you want to come back and adjust anything, and "reprint" the image.

The other alternative is to just "play" with all the built-in filters which Photoshop provides, and see if anything turns out really neat. I explored many of them, and found some potential with these ones...

"Glowing edges" is pretty funky:
Funky Photoshopped swallowtail butterfly image
"Cutout" looks like a silk-screen image (does anyone use that technique anymore? Most everything has gone digital, even much of the professional printing):

"Watercolour" had a pleasant effect:
Swallowtail butterfly painting
Okay, your turn. Be sure to send me links to your images, and any tips or techniques you can share with the rest of us.

Bug Animation Videos

Thanks to Does Everything Grow Better in My Neighbor's Yard?, for introducing me to the "Minuscule" bug animation series on YouTube by "bentekr". They have been perfect for killing time at midnight while waiting for my husband to come home, wondering now why I didn't go to bed hours ago....

Some of my favourites are these:


And finally, for Christmas...

Wednesday, November 18, 2009

Garden Project : Day 5

It hailed this morning, just as I was saying good-bye to the kids at school at 9am. I had left the umbrella home, taking a chance with the overcast sky. So I was pelted by hail all the way home, which fortunately is only a couple of blocks.
Happily, my landscaping crew still arrived later in the morning. It rained lightly all day, as they worked, but they pulled on their hoods, and kept going.

Today they hauled up sand, and then compacted the path in preparation for laying the stones (click for a slightly larger view - this first photo shows a bit of the colouration of the stone, but I'll need to snap a closeup one day):
Base for flagstone pathway
Base for the flagstone path
They also removed the grass and set the stones into the lawn, between the stairs and the new flagstone path:
Flagstone set into the grass

Tuesday, November 17, 2009

Garden Project : Day 4

This morning we had a short reprieve from the rain. There were actually mostly-blue skies when I walked the kids to school in the morning. But by noon it was heavily overcast, and by early evening, rain again.

The forecast is not very comforting:
Weather forecast for Vancouver
Rainy weather forecast
However, I was very pleased to see my landscaping crew this morning, carrying my 2" flagstone and bench to the upper yard. Better yet, I had planned to work from home today, so was available for consultation as necessary (I tried not to hover around until asked).

By noon they were carrying loads of gravel. With the arrival of the gravel, the path suddenly has taken shape. The stones sitting around the perimeter will be laid in place once the gravel is compacted and covered in sand:
Path in gravel so far
The gravel is delivered one wheelbarrow load at a time, carrying it some 100' distance and 20' elevation gain. I am happy to see it get done, and not tempted to help!:
Gravel by the wheelbarrow load
By the time the crew is finishing up at 4:30pm, it is getting dark, so my photos are either blurred or dimly light by the flash. We picked out 6 large stones to lead from the stone stairway and the pathway:
Stone pathway through the lawn
Once they are laid in place, one of the guys cuts the edge, and will eventually remove the grass below, laying the stone directly into place. I suspect they were anxious to cut the edges, before I changed my mind about the placement of the stones, since we tried a number of stones and arrangements until we got it right. By the time they packed up to leave, the rain had already begun:
Stones through the grass
The flagstone is called "Mountain Grey". I wish you could see it, it is not just grey, but has swirls of browns and other colours across it. On my occasional visits to the landscape supply yard over the last year or so, I picked this stone as my favourite every time. The landscaper tells me today that when he ordered it, they had JUST enough stone for the project (we'll find out if we're a bit short, but so far it looks good!), and NO additional stock of the 2" material (only a 3/4 - 1" version). They wouldn't be bringing any more until the Spring. I humbly thank God for the timing, because I would not be willing to choose another stone, and the thought of waiting until Spring at this point would be more than I think I could bear.

So the project proceeds. Hopefully tomorrow morning the sand will be carried up the hill, and the placement of stones can begin. By afternoon it is 100% (gotta like those odds - NOT!) probability of precipitation - up to 20 mm (just shy of 1 inch)! I had only 1 meeting scheduled at the office, which I've switched to Thursday, so I plan to work from home again to enjoy the progress.

Monday, November 16, 2009

Garden Project : Day 3+

It has been a very rainy November. When I talked to my landscaper last week, he said he was surprised by how suddenly the weather has changed to rain. I don't know if we've had any full 24hr without rain since that first week of November, which had a few dry days.

My landscaper came last Thursday and did a bit of digging out of the pathway. I would have dug it out a bit deeper, but then again maybe it's a good thing he did what seemed to me a poor job, since in my experience, if you dig in that area, then it starts to fill with water (the area slopes lower than the drainage pipe across the top, so the water will take the lower route if it can), and then it's not a good situation.

So instead, if he fills with gravel & sand, and then places the stones above, I will ask him to bring in a load of soil, and raise the beds around the path. That will anyhow be a good idea on the side which was lawn, since there was probably only 3" or so of soil there on top of the clay. And the center of the path should be raised since I am planning for some lilacs there, and from what I read, they prefer a raised bed, for better drainage.

Here are some photos at the end of Day 3 :
Garden pathway forming
Path for flagstone pathway
Today counts as Day 3+, since he had the flagstone and the granite bench (I hope!) delivered in a pallet onto the driveway this afternoon. I was very happy to see it when I arrived home from work.

So it feels like a little bit of progress, anyhow. Although with less than 6 weeks until Christmas, and no sign of an end to the wet weather, I am really hoping it can be done before Winter sets in.

I made some progress on the lighting. I decided against a lamp post. I think the light will be disproportionately bright for that small area, and I didn't see any I really liked the look of. Instead, I will go only with a low voltage system - some lights along the path, maybe some uplights into trees or downlights from trees. So this can be put in after the fact, like in the Spring. No need to set them out just to be abused by the weather all Winter. Since I'm not likely to be sitting out there this Winter - or at least not in the evenings.

Wednesday, November 11, 2009

Fraser Foreshore Park

Since we were all home for Remembrance Day today, we decided to take a walk in the afternoon, between rain showers. We haven't been to Fraser Foreshore Park in Burnaby (BC) for some while, and had forgotten how peaceful it is, to walk along the trail next to the Fraser River, under tall cottonwood trees, which have turned quite yellow this time of year.
Fraser Foreshore Park in Burnaby BC
The snowberries (Symphoricarpos albus) in the underbrush along the sides of the trail caught my attention, and I snapped a number of photos of them.
Snowberries
Snowberries
Snow berries
White snowberries
When the kids were small, there was a very large snowberry bush / thicket in the neighbourhood, and the kids were delighted at the popping sound the berries made when stepped on. I guess those fond memories are one of the reasons I kept two snowberry bushes in our yard, which popped up on their own, even though they sucker terribly, and I keep wondering why I keep them. (Actually, I had 3 originally, but the one in the center of my upper yard became unmanageable, and a year or so after removing it, I am still chasing down suckers and removing them.) So when we reminded the kids today, they rediscovered the joy of popping the berries, and we had a hard time stopping them from collecting berries once they got started.
Picking snowberries for popping
Finally, I reminded them that this is a food source for birds in winter, and we'd better leave some for the birds. They respected that. The start of the rain also helped to focus our attention on getting back to the car.

There were also a noticeable number of red osier dogwood, their leaves turning yellows and reds (sorry, no photo), and these bright red rose hips:
Rose hips
I had taken only my daughter's Kodak Easyshare camera, since it fit in my pocket, unlike our Canon EOS, and anyhow I expected it to start to rain while we were there (which it did, but only as we were leaving). Then we encountered some chickadees along the path, and I suddenly wished I had brought the Canon.
Chickadee among snowberries
Later when I heard an eagle's call high up in the cottonwood trees, I really wished I had the Canon. So I did my best, but the zoom on the Kodak was quite inadequate, and these are the best I could manage, of the pair of bald eagles:
Bald eagles in cottonwood tree
Pair of bald eagles
I was lucky that as I was snapping photos, they flew off, and I caught this one as it took flight:
Bald eagle in flight
I hope you all had a relaxing and reflective Remembrance Day or Veterans Day today.

Tuesday, November 03, 2009

Garden Project : Still Day 2!

This is a frustrating week for me. I have already waited patiently for over a year for my garden project to start. Seeing the beautiful clear weather this week, I phoned the landscaper, and found out that he is doing his "last" lawn cutting of the season for his clients this week, and will not be coming until next week. By then we could be back into rain!

On top of that, he lost my descriptions of the flagstone and bench which I had picked out already a long time ago. I'm sure I kept a copy myself, but also misplaced it, after waiting so long. So somehow I may need to fit in a visit to the landscape depot again.

All I can do here is pace around, and try to visualize the new "secret garden" better. So here goes....

From the stairs, individual (large) flagstones set in grass take the visitor to the top of the hill, gently directing them to the garden on the right....
Secret garden
...where they will pass through a vine-covered arbour into the "secret garden"...
Secret garden
Okay, here you need to visualize the arch, since I haven't bought it yet... I saw this little beauty (Panacea Vine Arbor) on the internet last year (and it's still there this year!), but couldn't track down anything like it locally (i.e. in Canada), so still have it stuck in my mind:
Secret garden
The walkway leads to a small bench (a granite one, not the metal one I placed there today so I can check out the "views").... (From this upper side, I am thinking of placing back a row of lush peonies, with higher plantings behind, to give some sort of veil around, not totally blocked off, but a somewhat obscured view of the garden.)
Secret garden
The bench looks out between the branches of a young coral maple, toward the house...
Secret garden
Looking back out from the bench, through the archway, I guess there is a view of the chess set:
Garden planning
Here is another view from inside:
Garden planning
Where the white post is, I'm thinking of a lamp post, for evening lighting. The center garden will feature fragrant flowers, including a beautiful collector specimen Syringa Sweginzowii ("Chengfu Lilac") which was given to me recently by my gardening friend JJ. It is small, but I think will grow into that area nicely. I am thinking of setting it with 2 other lilacs (it may be a bit crowded, but I like fullness in the garden), each blooming at different times, and then lavenders and other smaller plantings around them and around the bench.

Here is a final photo from our 2nd floor balcony. We'll be able to see into the secret garden in winter, but it will be mostly hidden from the house in summer:
Garden planning
Blog Widget by LinkWithin